The complete guide to the Malawi POE Sentinel app for border screeners — every screen, from signing in to working offline, start to finish.
App version 1.0For: Screeners & POE officers23 screens covered
Section 1
Get the app & sign in
Install the official app from the download centre, then sign in with the account your administrator created. There is no public sign-up — accounts are issued to staff only.
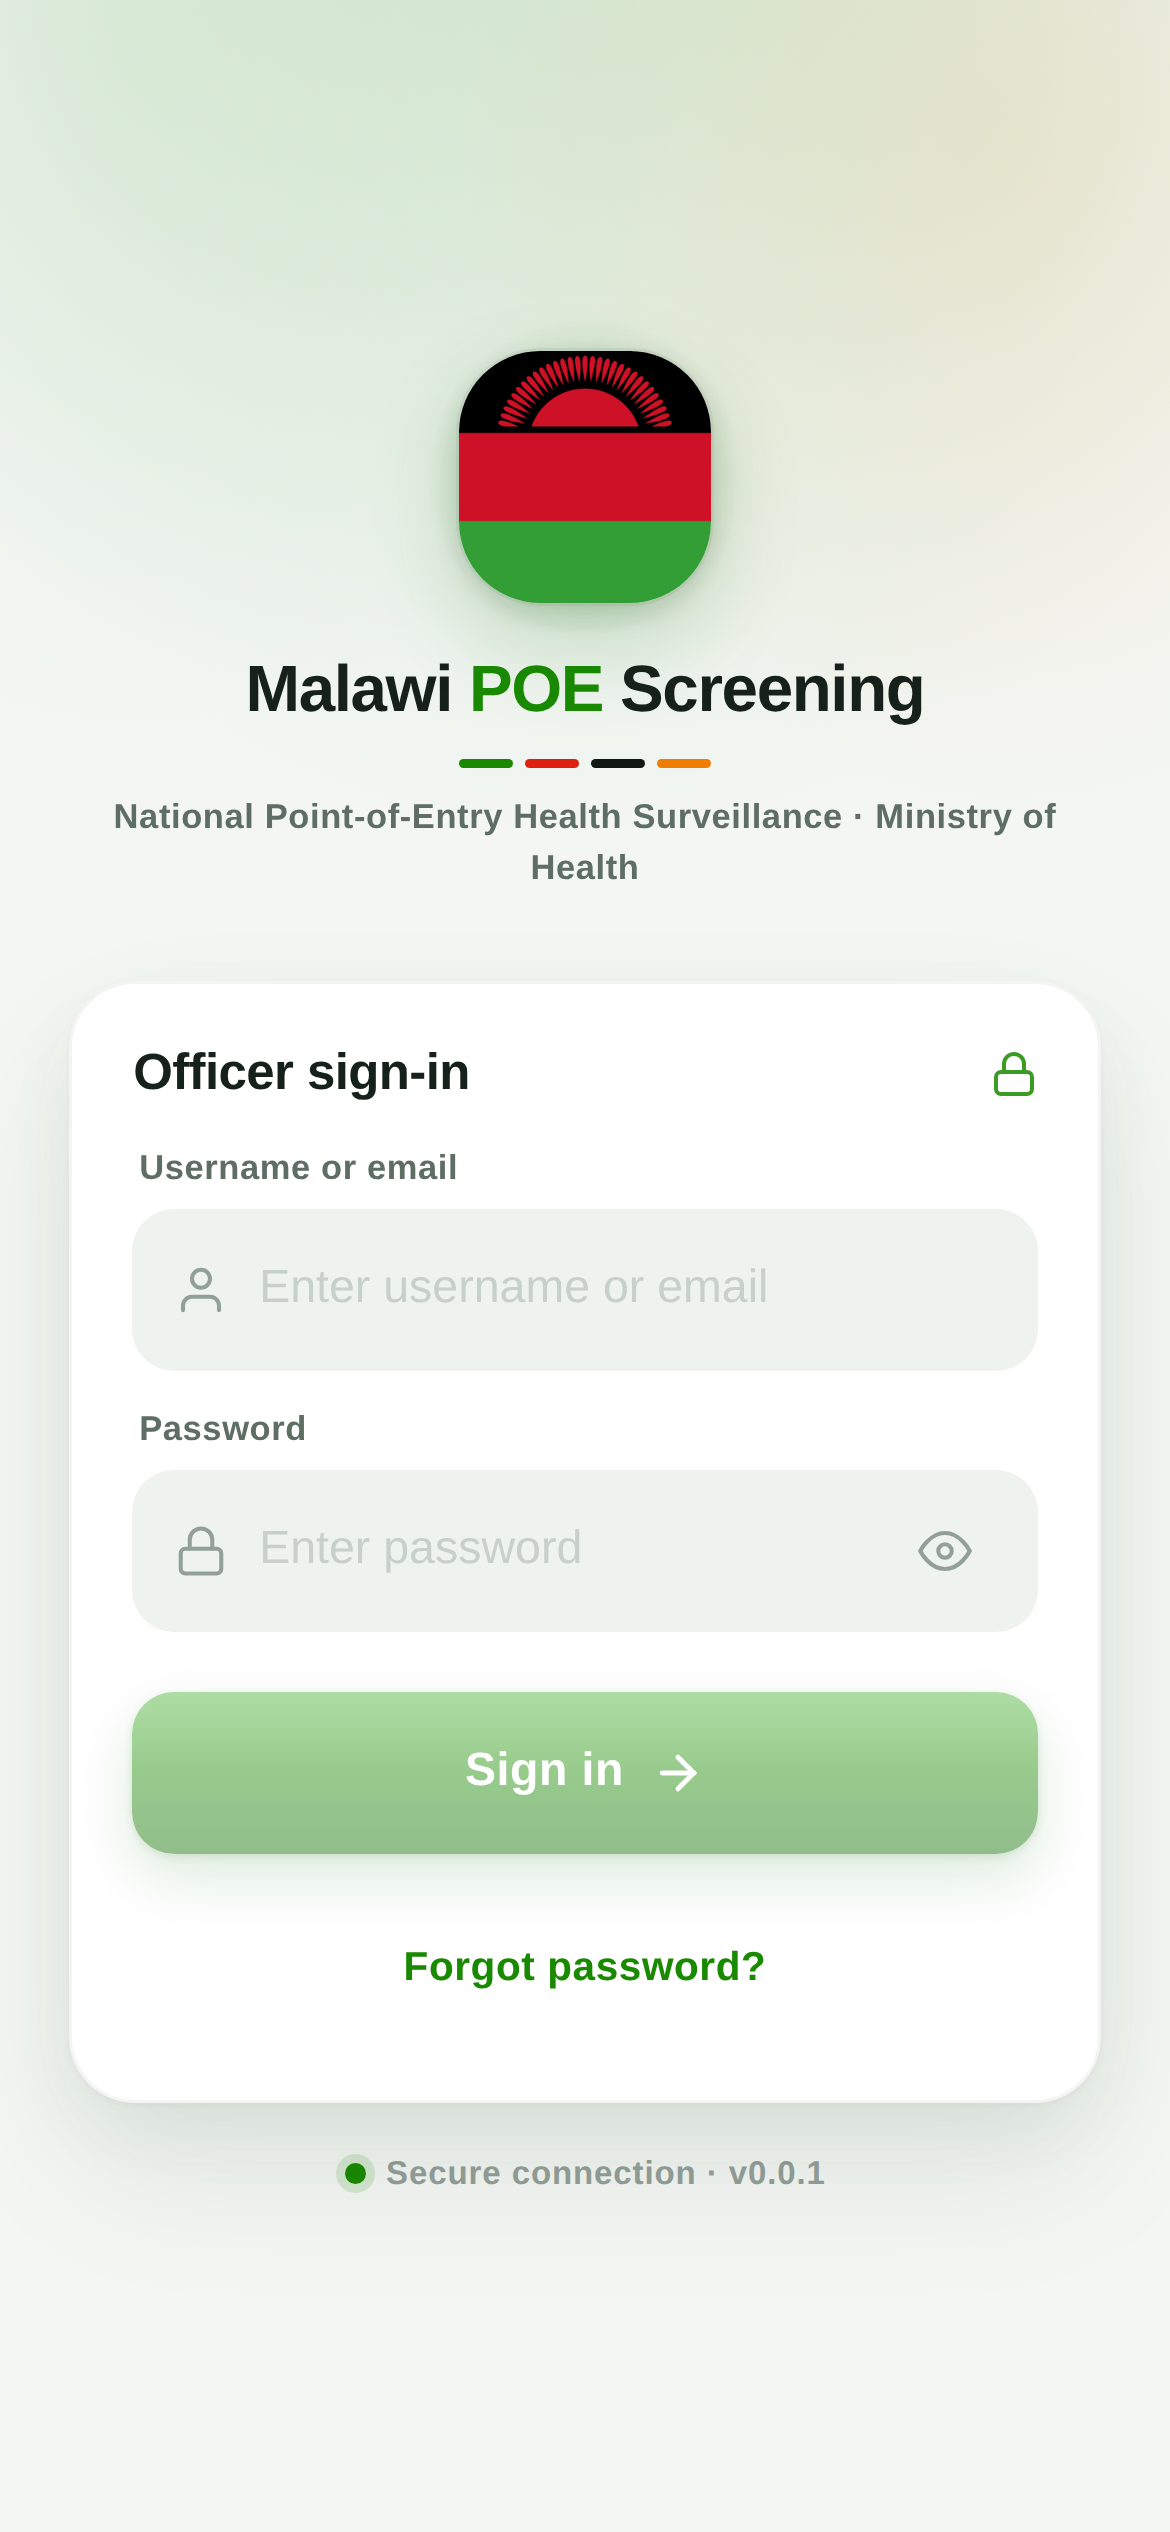
Officer sign-in
Install the app. Open the download centre — iPhone (Add to Home Screen in Safari) or Android (signed APK). Pick Live for real work, Training to practise.
Check the environment. Confirm the right environment before you sign in.
Enter your details. Type your username or email and the password your administrator gave you.
Tap “Sign in”. You land on your home screen as a Sentinel Officer.
What to expect: A green “Secure connection” badge at the bottom. First time on a device you may be asked to set a PIN.
Never share your login, and always sign out on a shared device. Forgot it? Use Forgot password (last section).
Section 2
Your home screen
The home screen is your shift dashboard — today’s numbers, the two things you do most, and quick links to everything else.
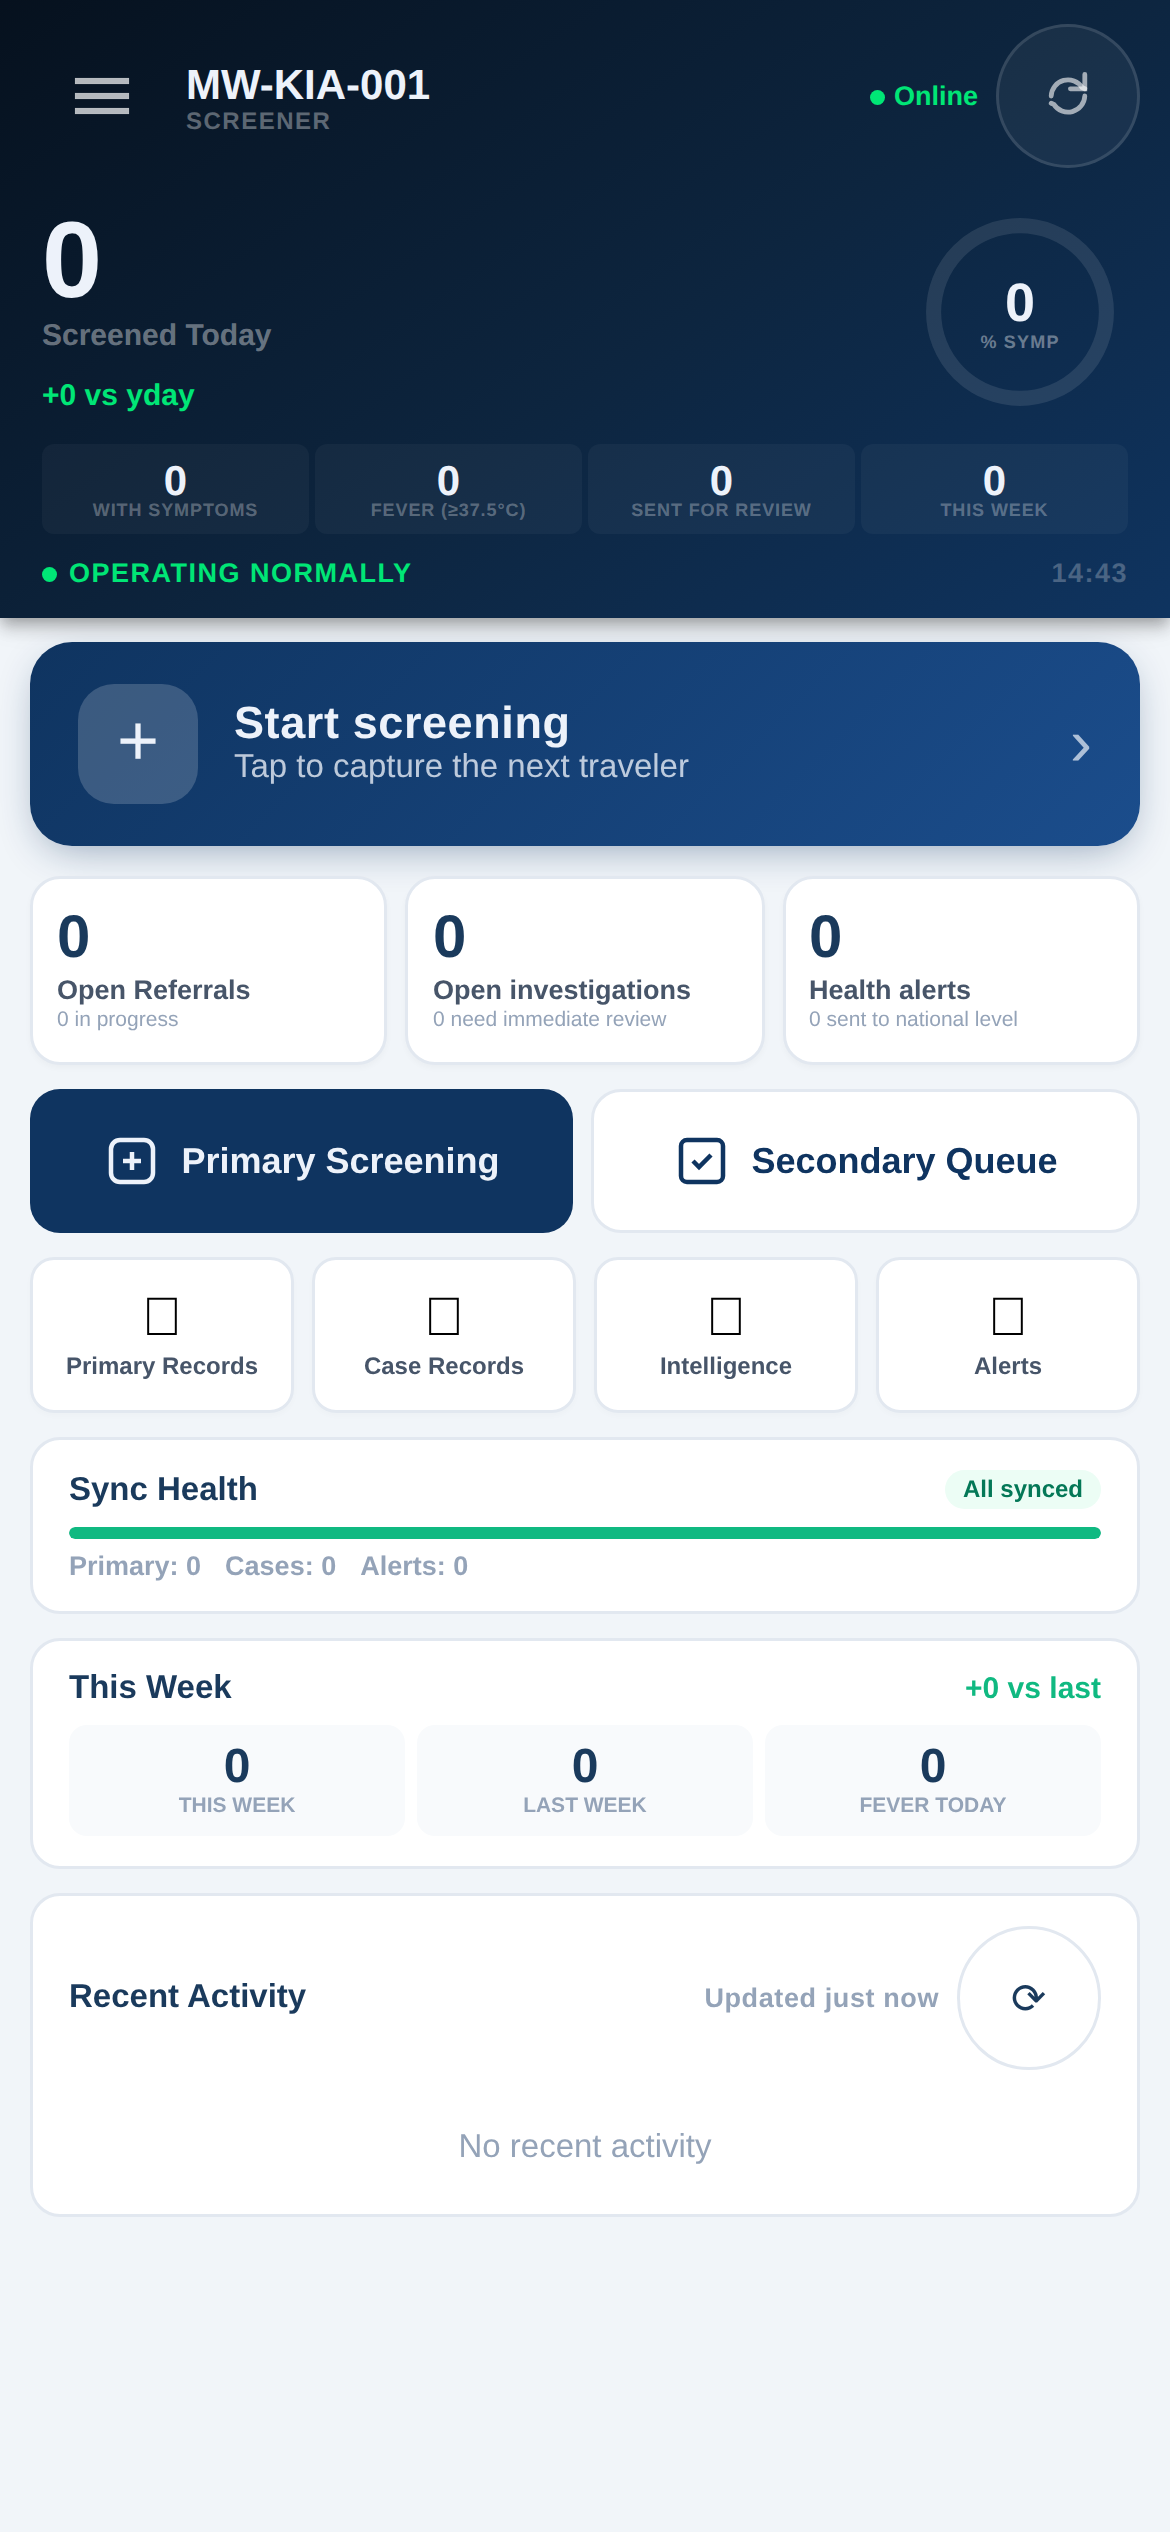
Home / shift dashboard
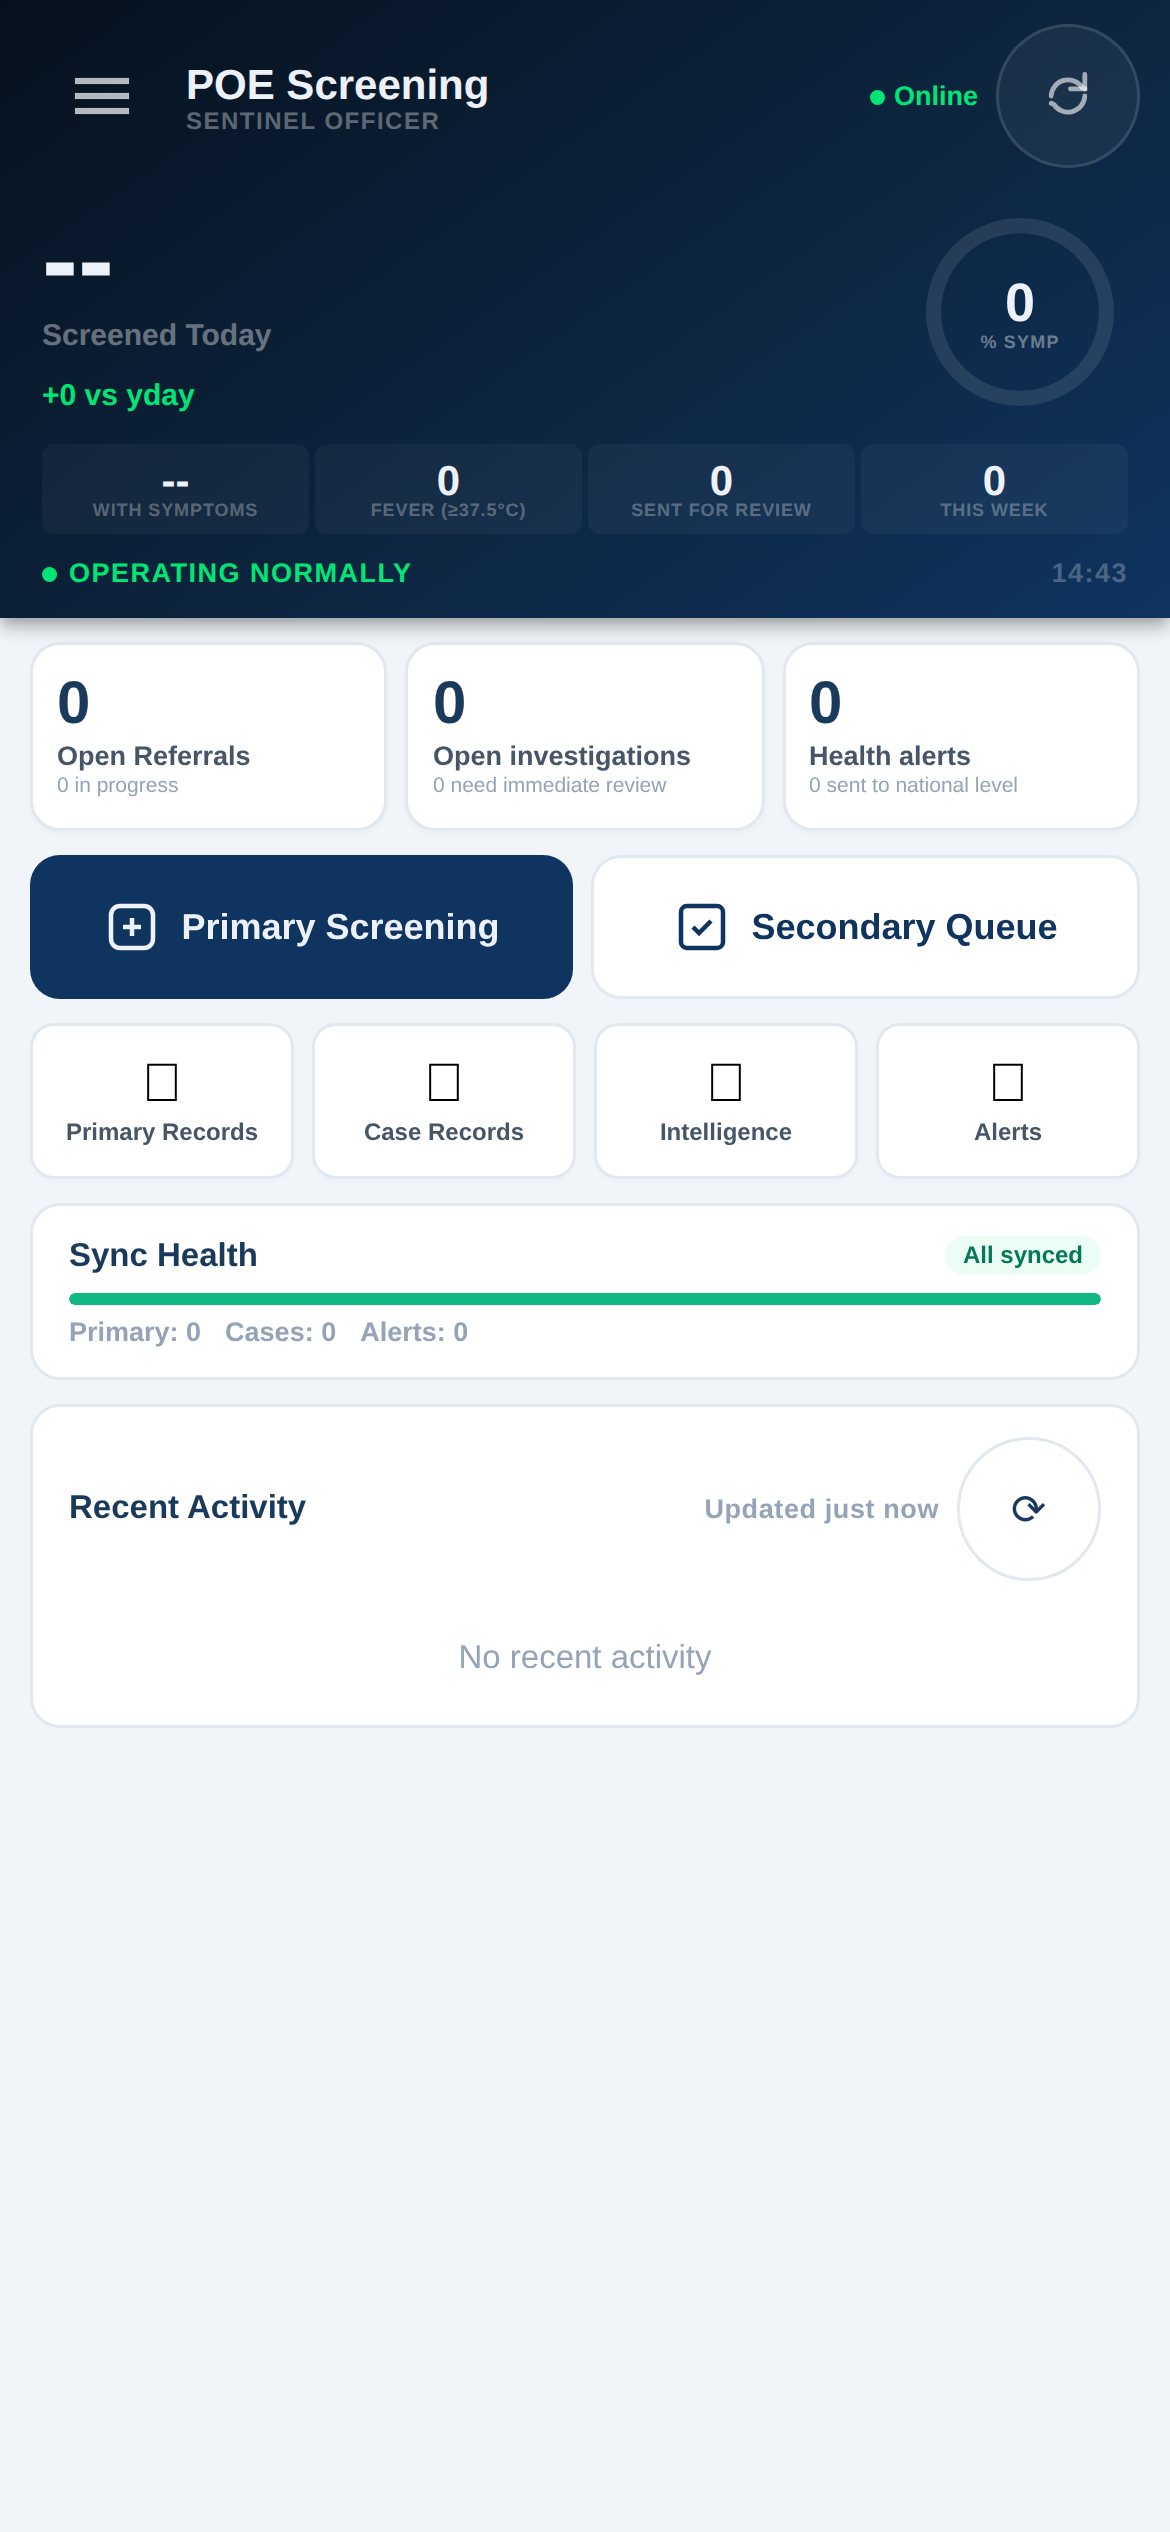
Screened Today. Running totals — with symptoms, fever, sent for review, and this week.
Primary Screening. The big button — tap it to screen a traveller.
Secondary Queue. Travellers flagged for a closer look.
Quick tiles. Primary Records, Case Records, Intelligence and Alerts.
Sync Health. Confirms everything on the device has reached the server.
What to expect: A green “Operating Normally” banner and an “Online” indicator when you have signal.
Section 3
Primary screening — the core task
A fast, guided check for every traveller. Work top to bottom; the form tells you what is required and reacts to what you enter.
The primary screening form
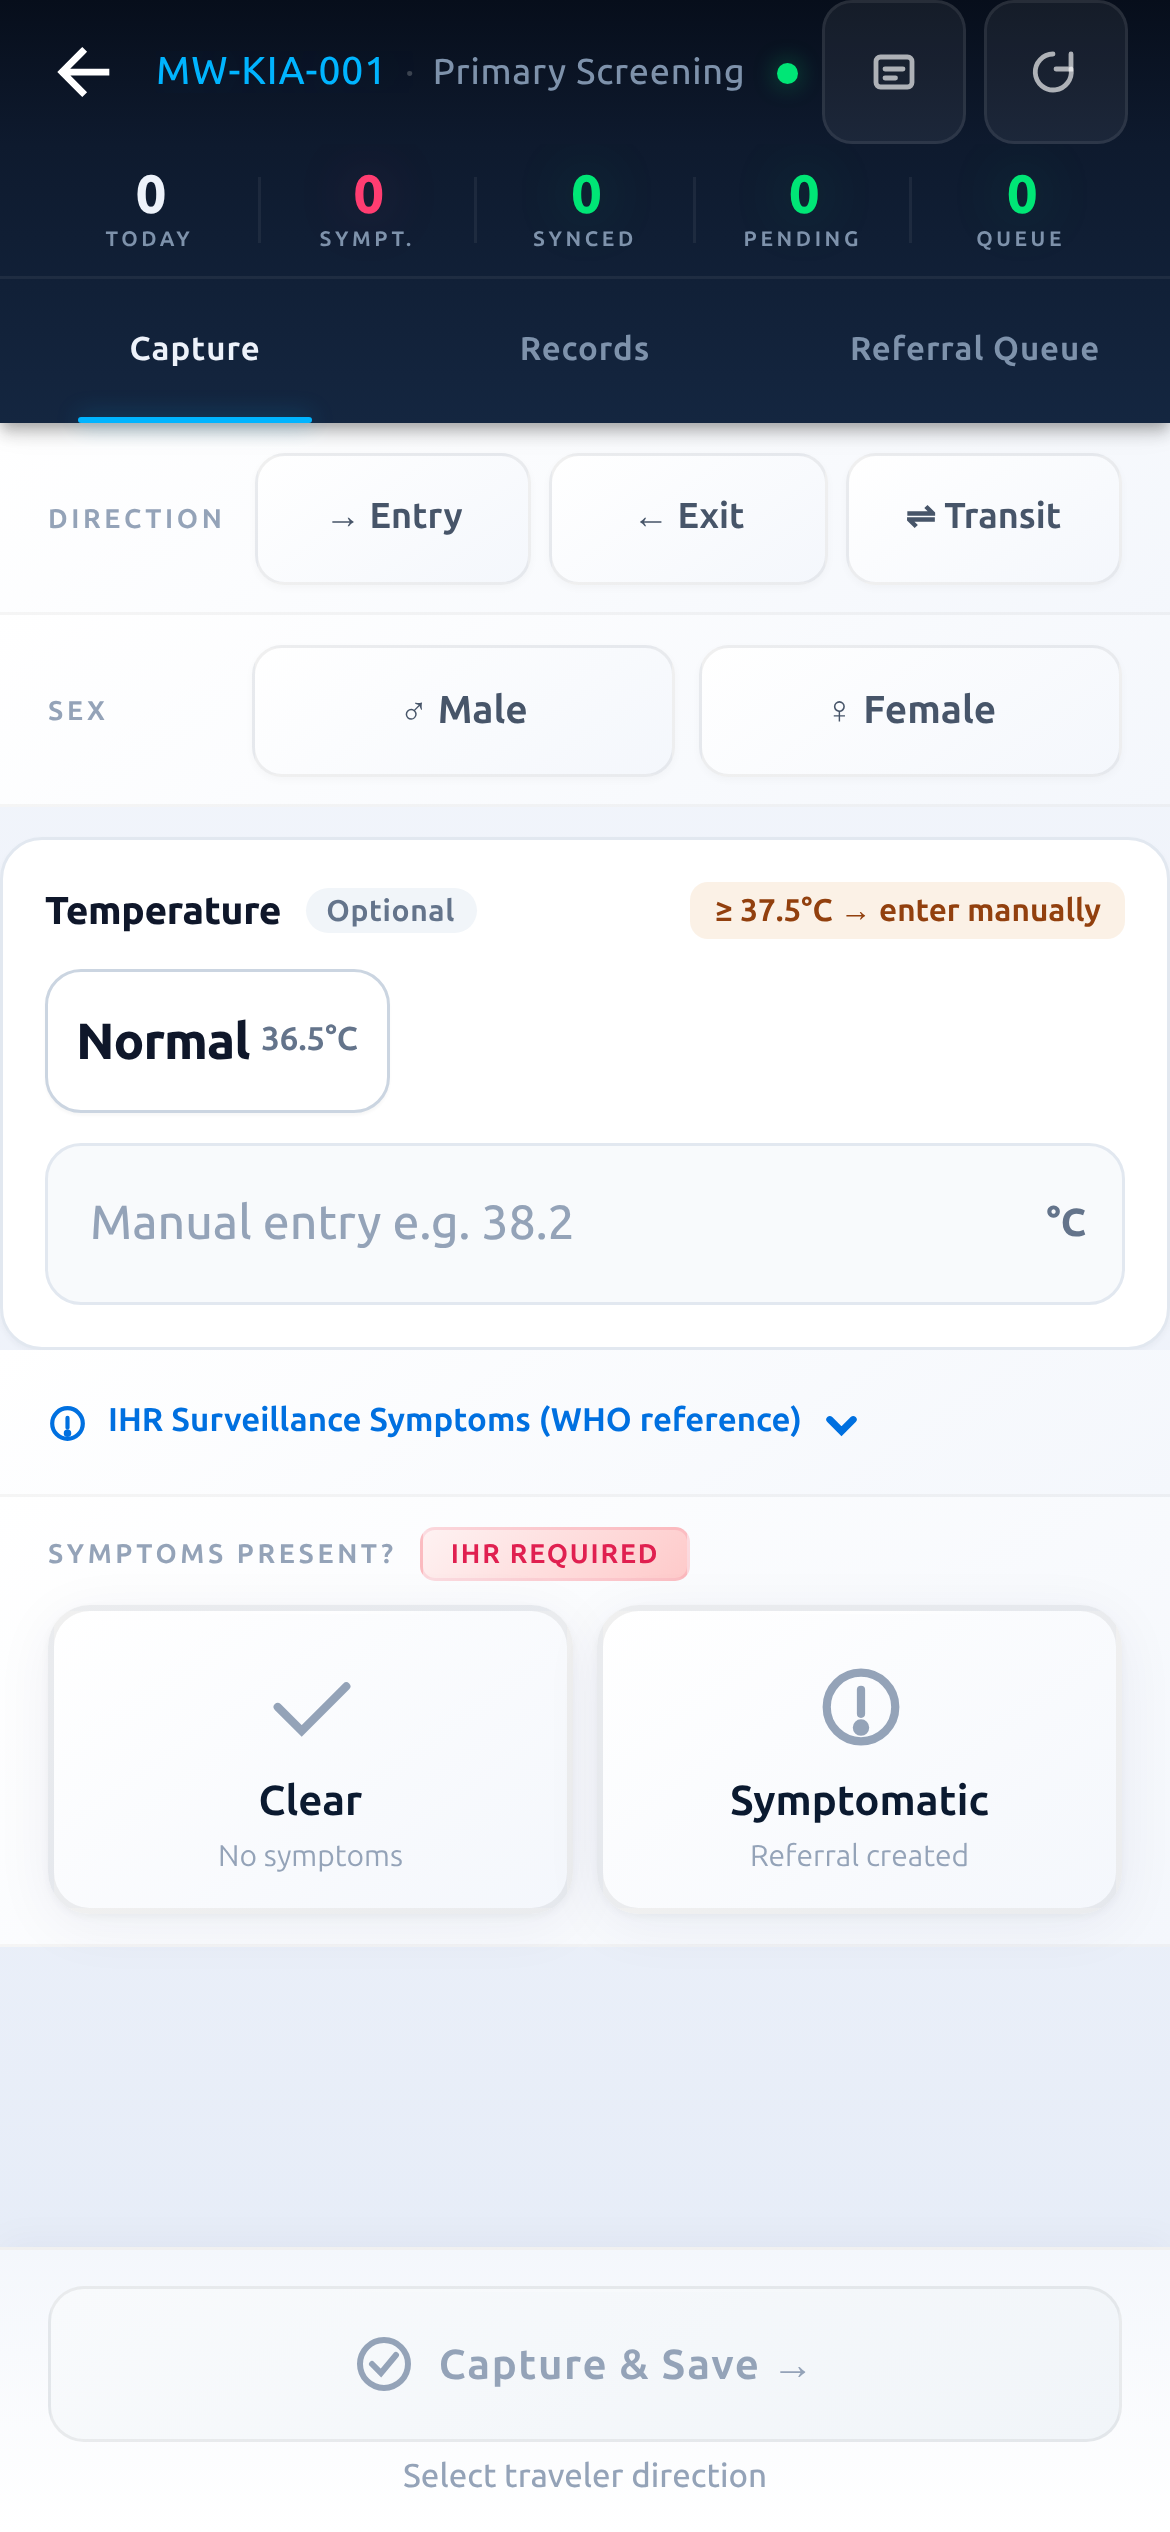
Direction. Choose Entry, Exit or Transit — match the traveller’s actual movement.
Sex. Tap Male or Female.
Temperature. Leave as Normal, or if it reads ≥ 37.5°C tap to enter the exact reading.
IHR symptoms. Open the WHO-reference list and mark anything present (required).
Outcome. Tap Clear or Symptomatic.
What to expect: The header shows your assigned point of entry (e.g. MW-KIA-001) and a live count of today’s screenings, synced and pending.
When a traveller is symptomatic
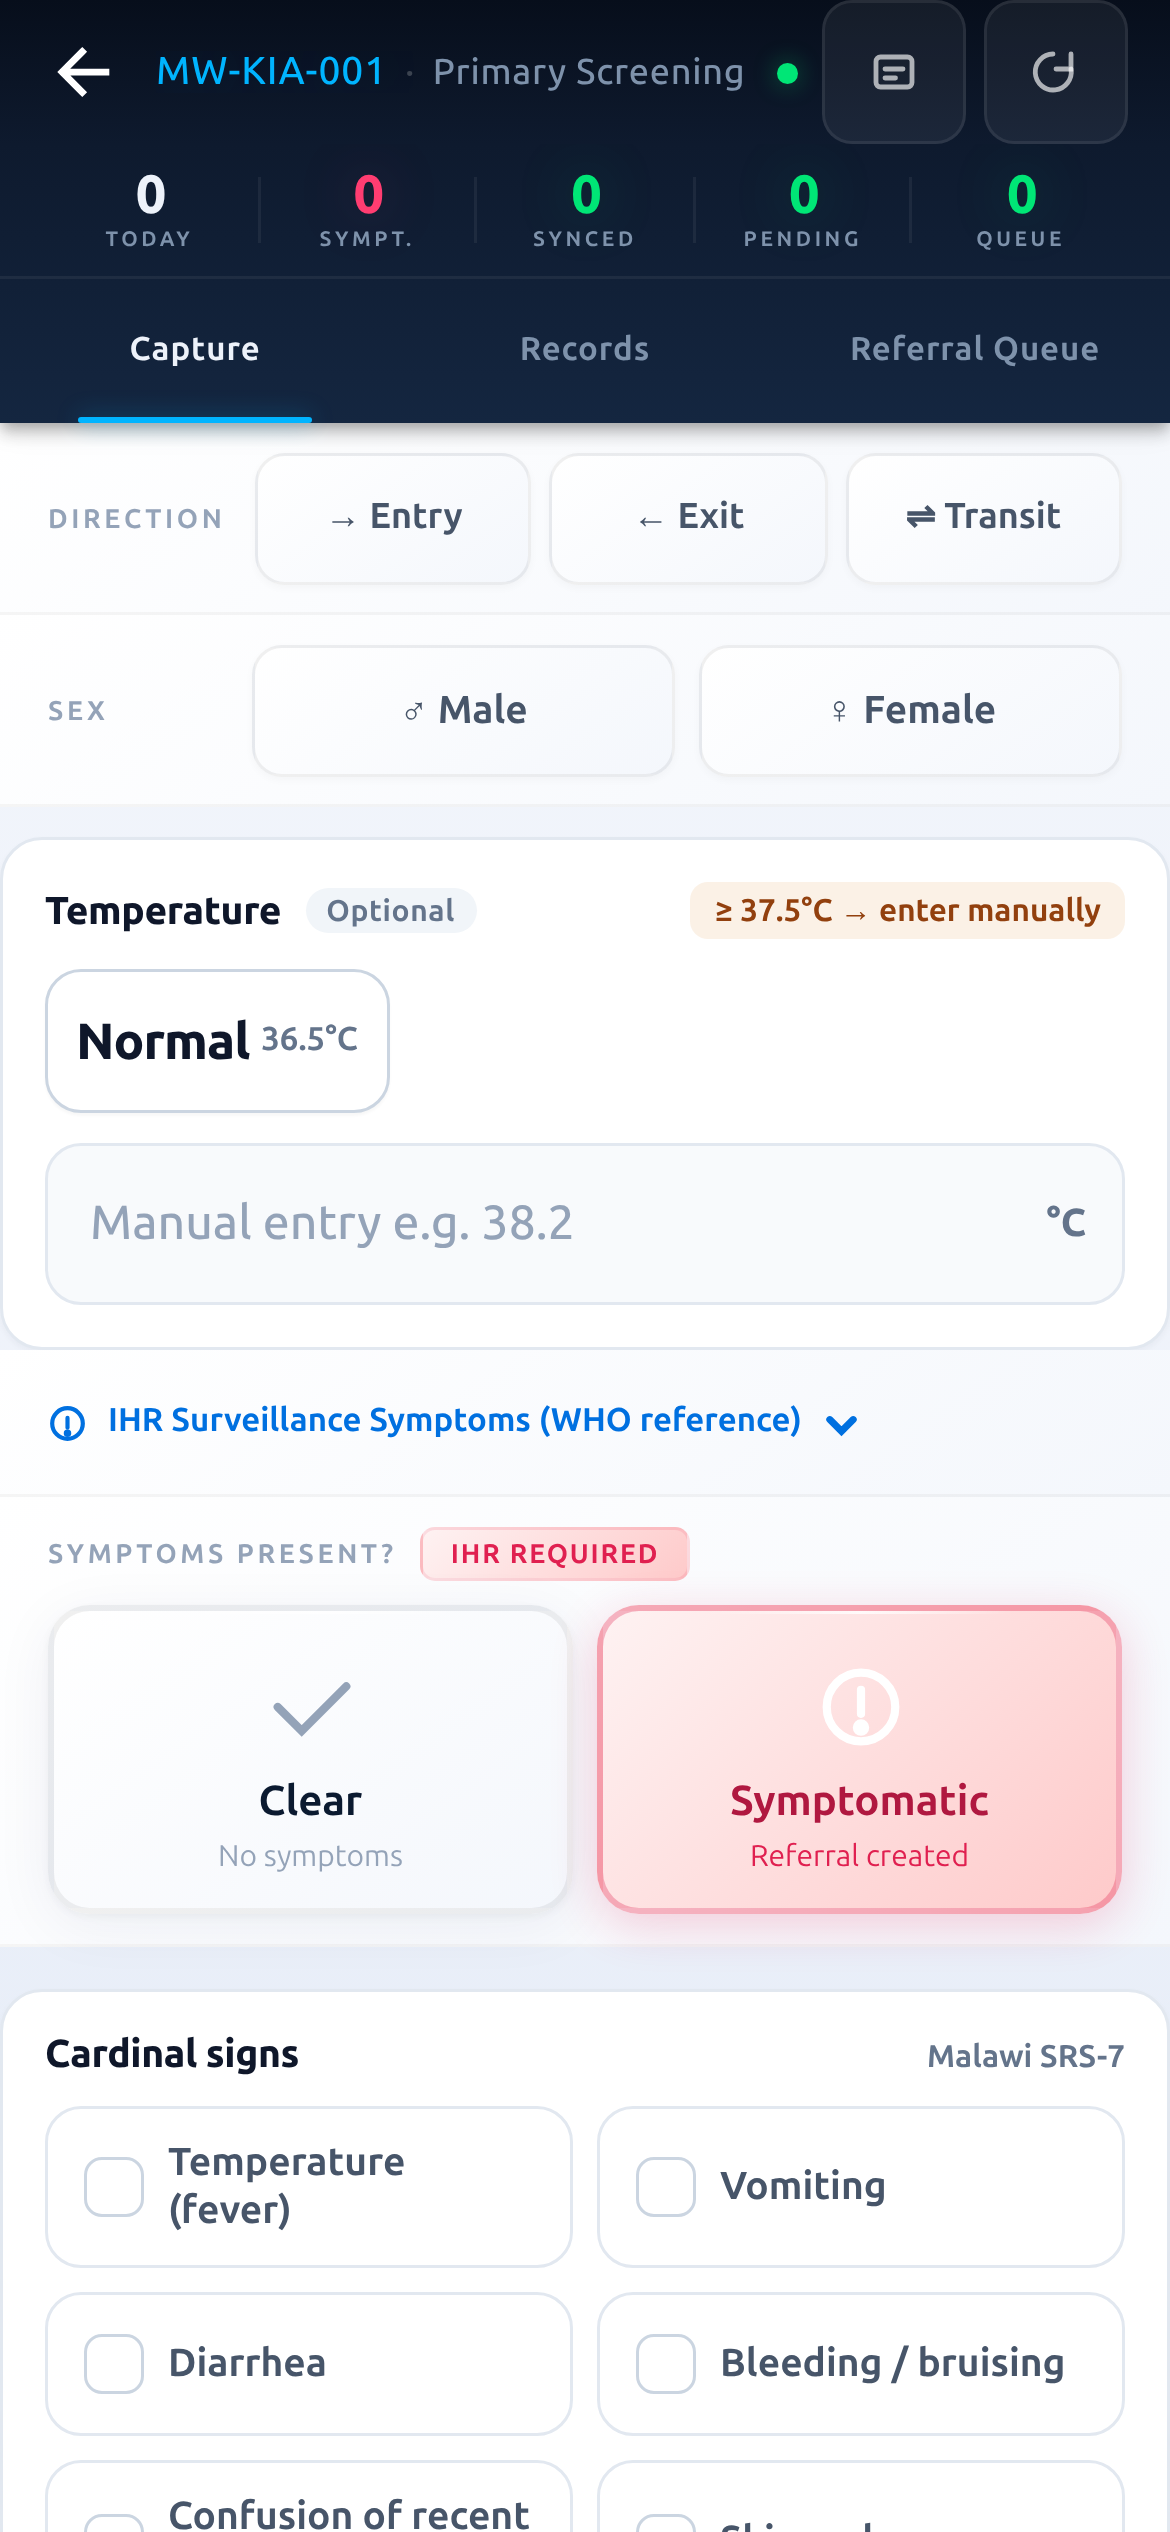
Choose “Symptomatic”. A referral is created automatically and the traveller joins the Secondary Queue.
Cardinal signs appear. Complete the Malawi SRS-7 checklist — fever, vomiting, diarrhoea, bleeding, confusion and more.
Capture & Save. Finish the record. It saves instantly, even with no signal.
What to expect: Choosing Clear instead completes the record immediately with no referral.
Section 4
Screening records & reports
Find, review and confirm every screening you capture — and read the numbers behind them.
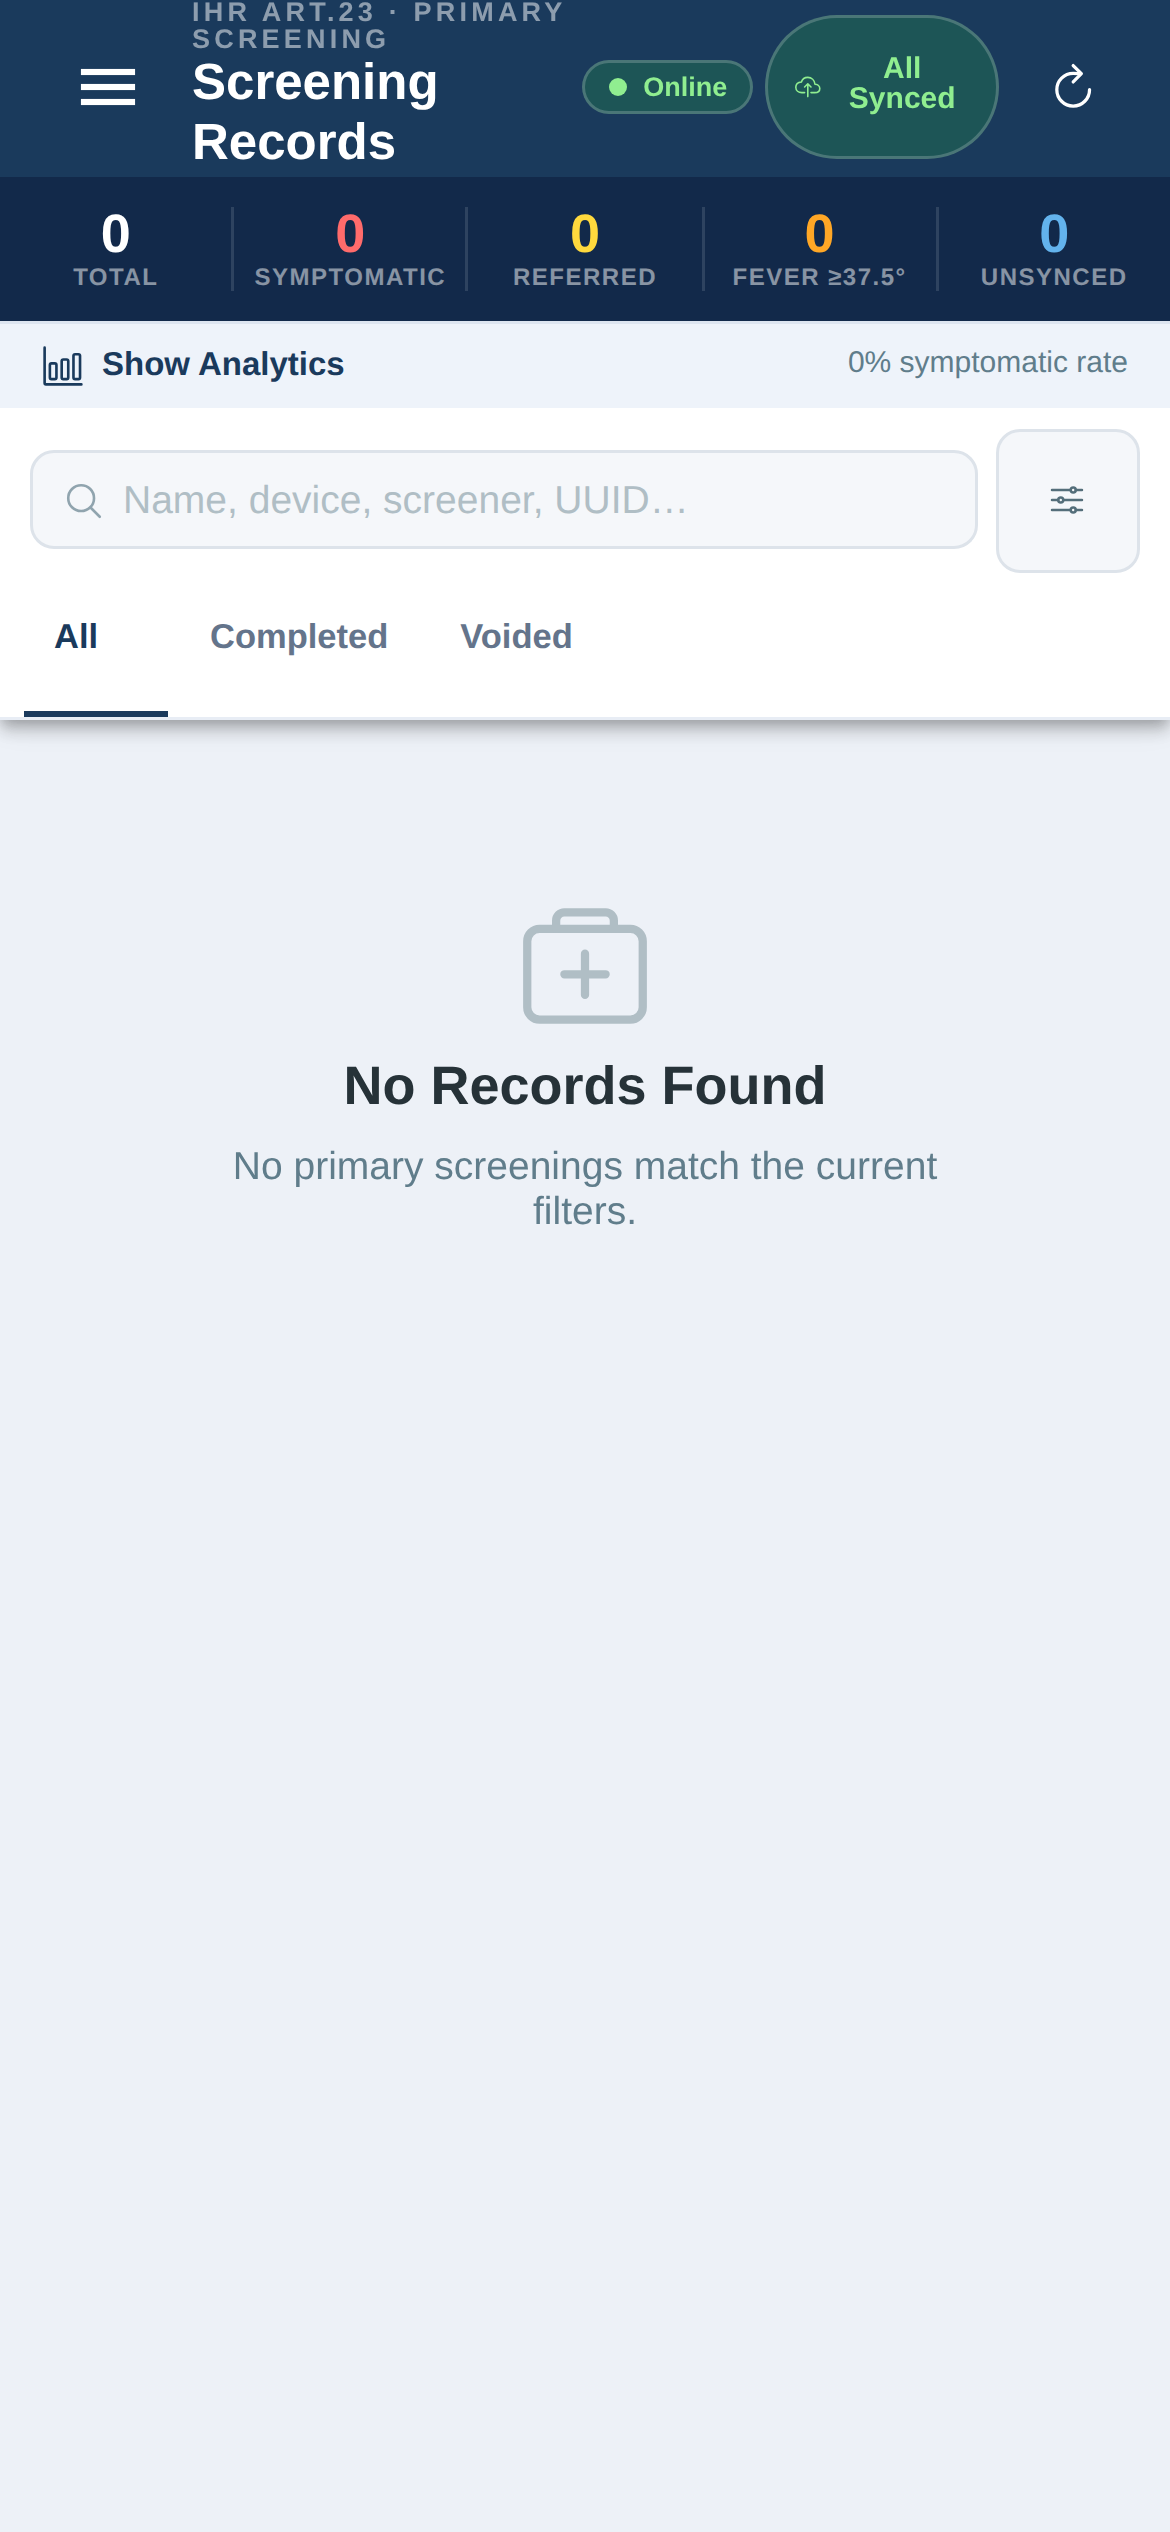
Primary screening records
KPI strip. Totals: records, symptomatic, referred, fever ≥37.5° and unsynced.
Search & filter. By name, device, screener or UUID; filter by date and status.
All / Completed / Voided. Switch the view; tap any record for full detail.
What to expect: A clean “No Records Found” state at the start of a shift; unsynced returns to zero once everything uploads.
Primary screening report
Read the summary. Volumes, outcomes and trends for your scope.
Adjust the window. Change the date range to answer your question.
Use for handover. A quick, reliable picture to brief the next shift.
What to expect: Numbers reflect only your assigned area and the selected dates.
Section 5
Secondary screening & your cases
Travellers flagged during primary screening move into secondary review. The cases you own are gathered in one place so nothing is missed.
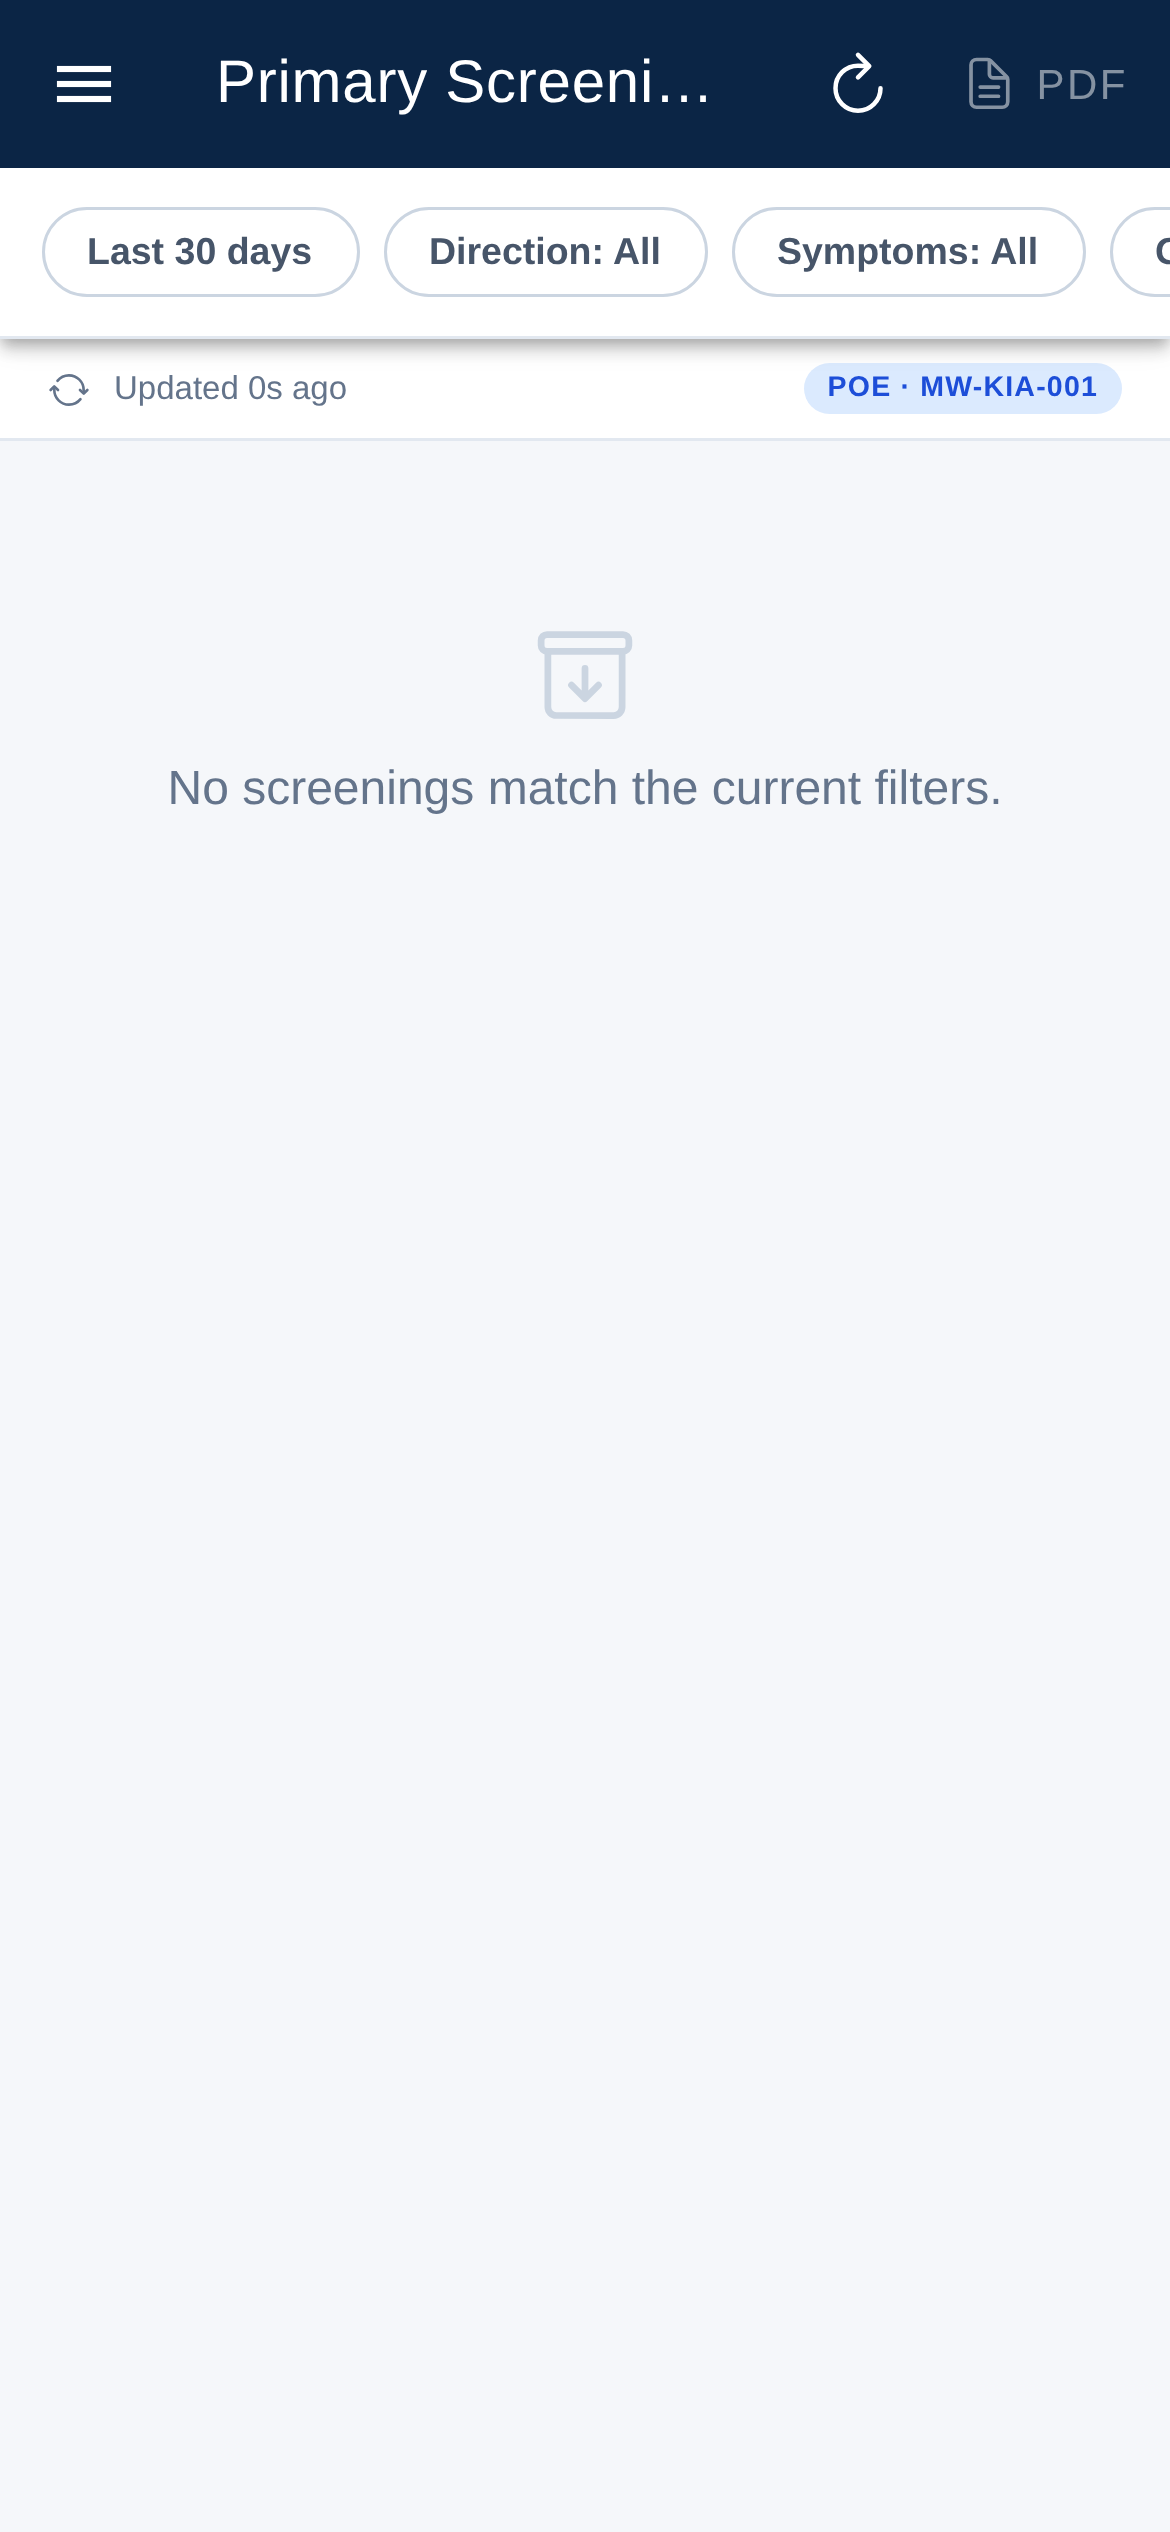
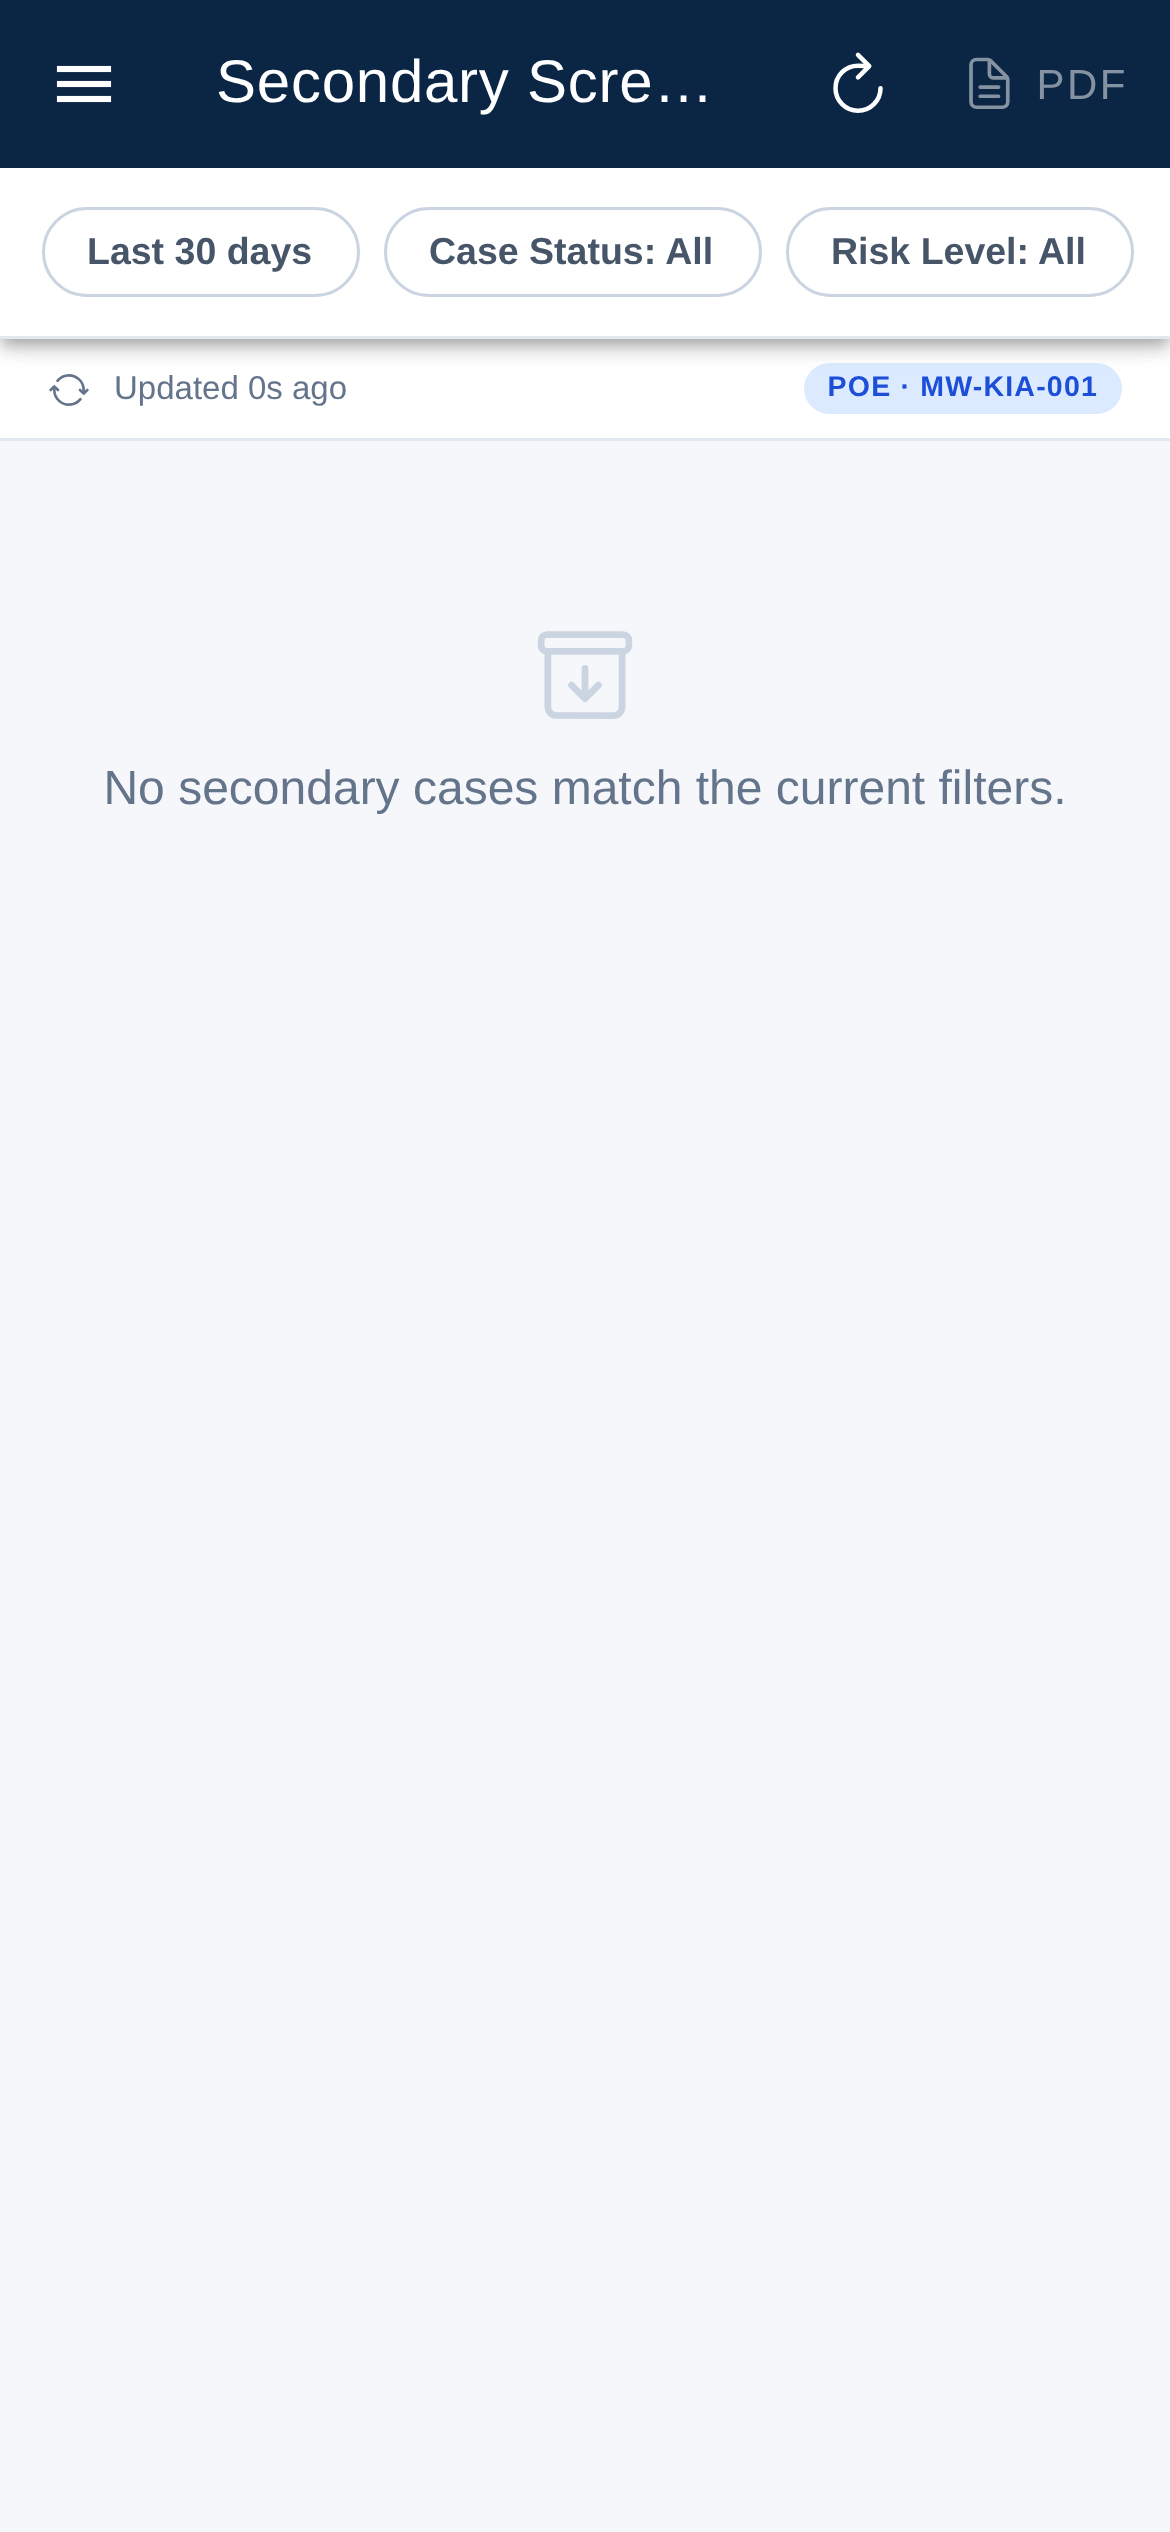
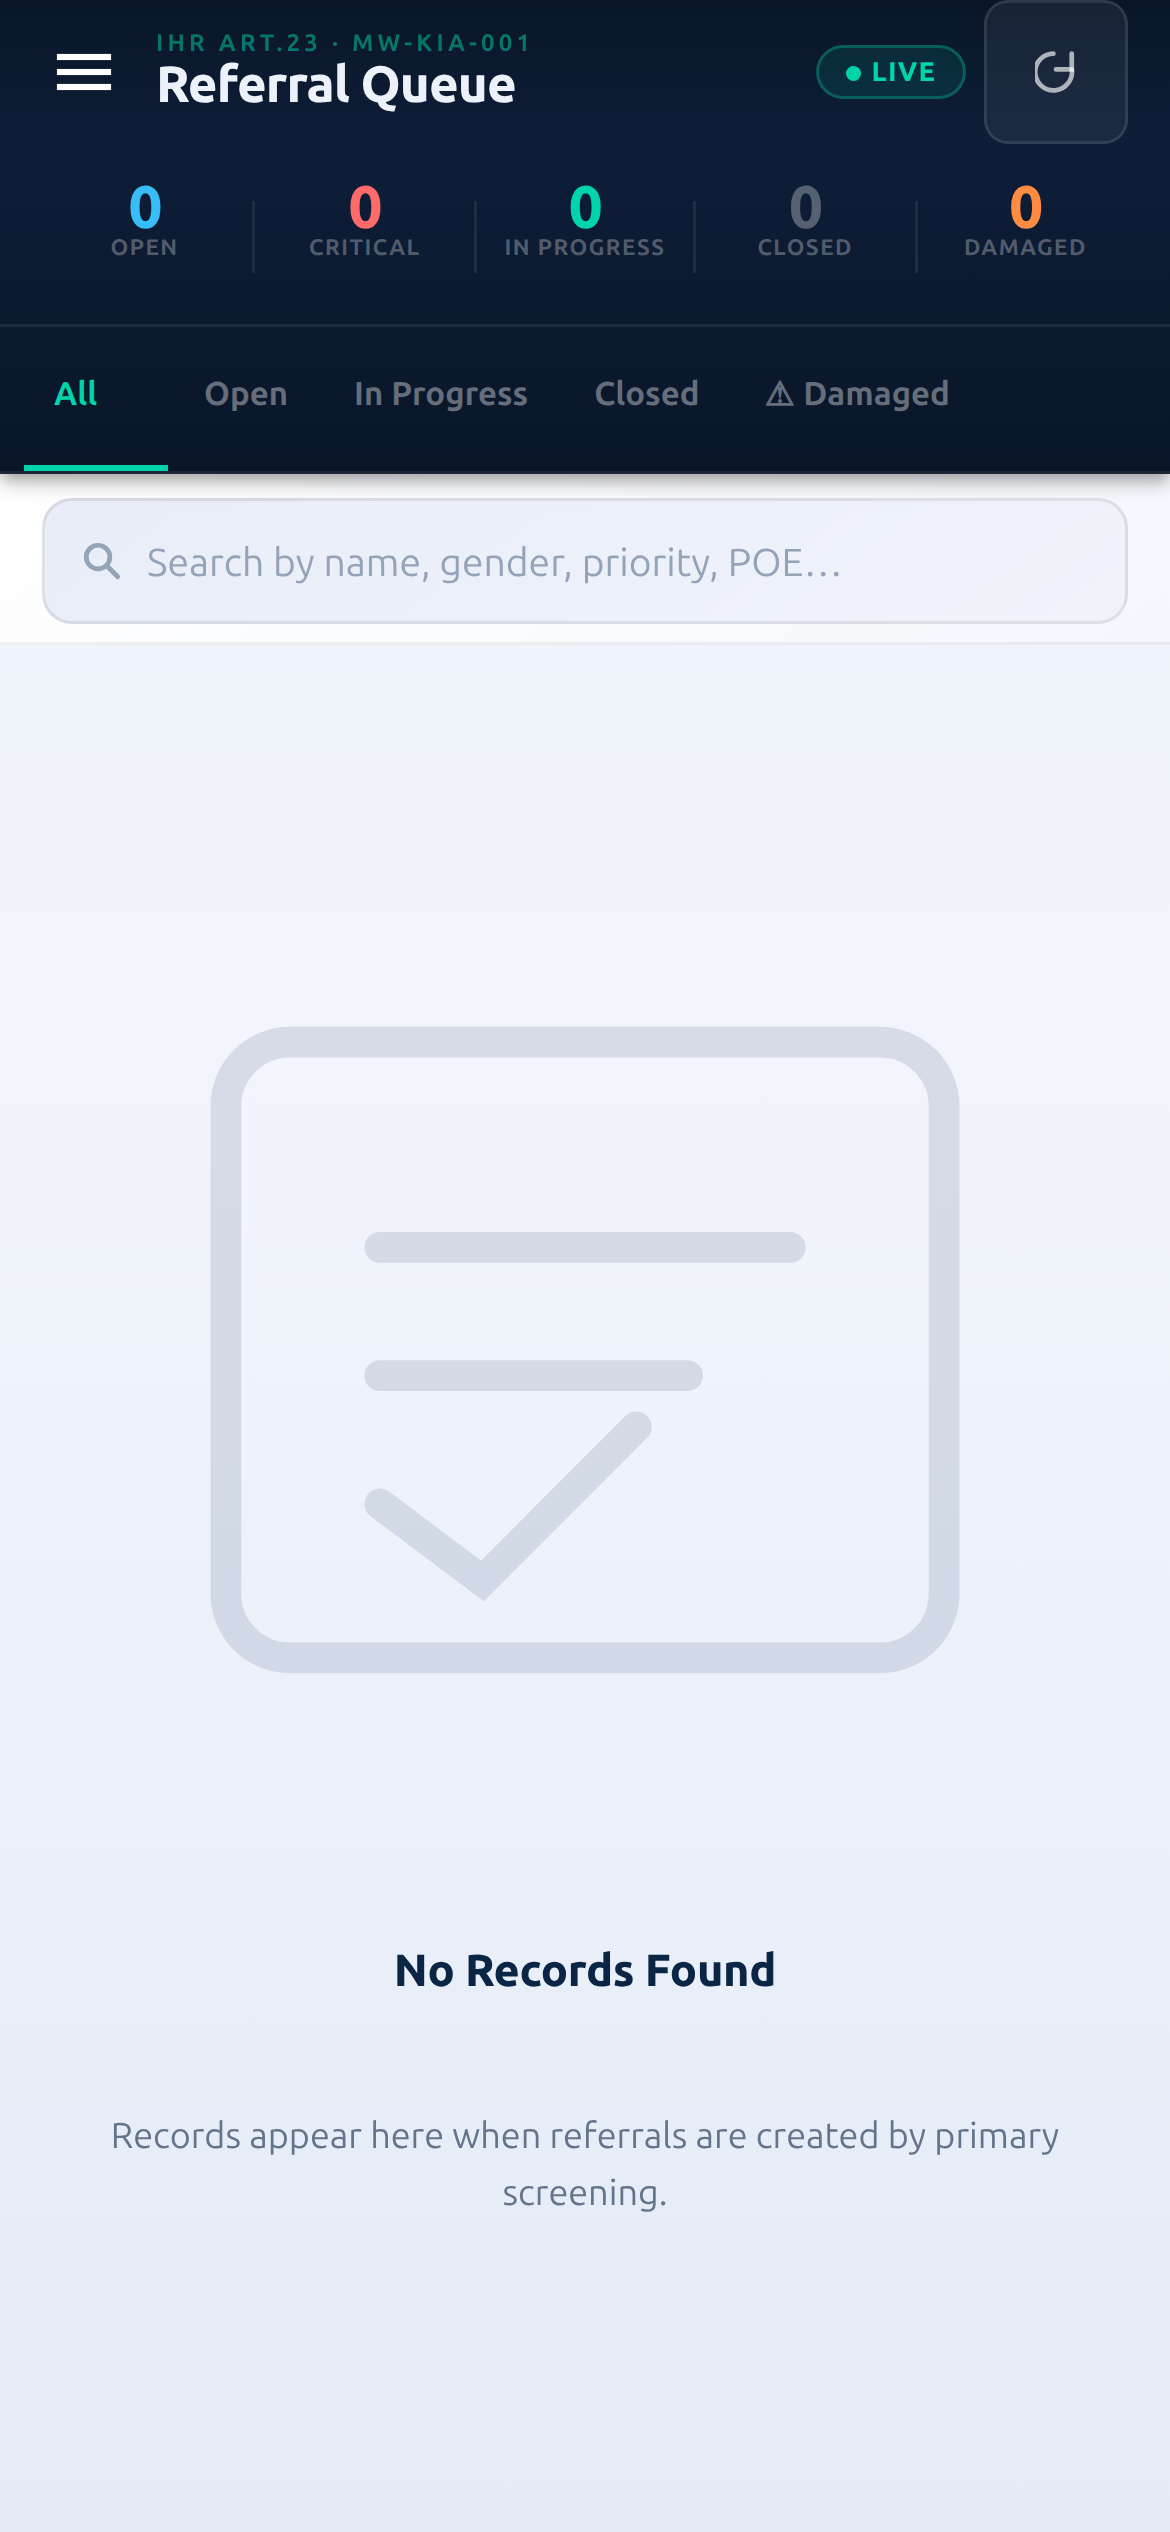
Secondary screening records
Open a flagged traveller. Continue or review the deeper assessment.
Record history & exposure. Capture the detail behind the flag.
Decide the outcome. Document the decision taken.
What to expect: Empty when nothing is flagged — normal. A flagged traveller appears straight after a Symptomatic primary screening.
Secondary screening report
Review the picture. Secondary activity and outcomes across your scope.
Spot patterns. Where flags are coming from and how they resolve.
What to expect: Pairs with the records list for a full secondary view.
My cases
See what’s yours. Everything assigned to you, in one list.
Work each to closure. Keep every case moving to a clear, documented outcome.
What to expect: Empty lists are normal in Training; live cases appear here as they are assigned.
Section 6
Traveller passes (self-screening)
Travellers who complete the public self-screening before arrival carry a QR pass. You can view them and scan a pass at your post.
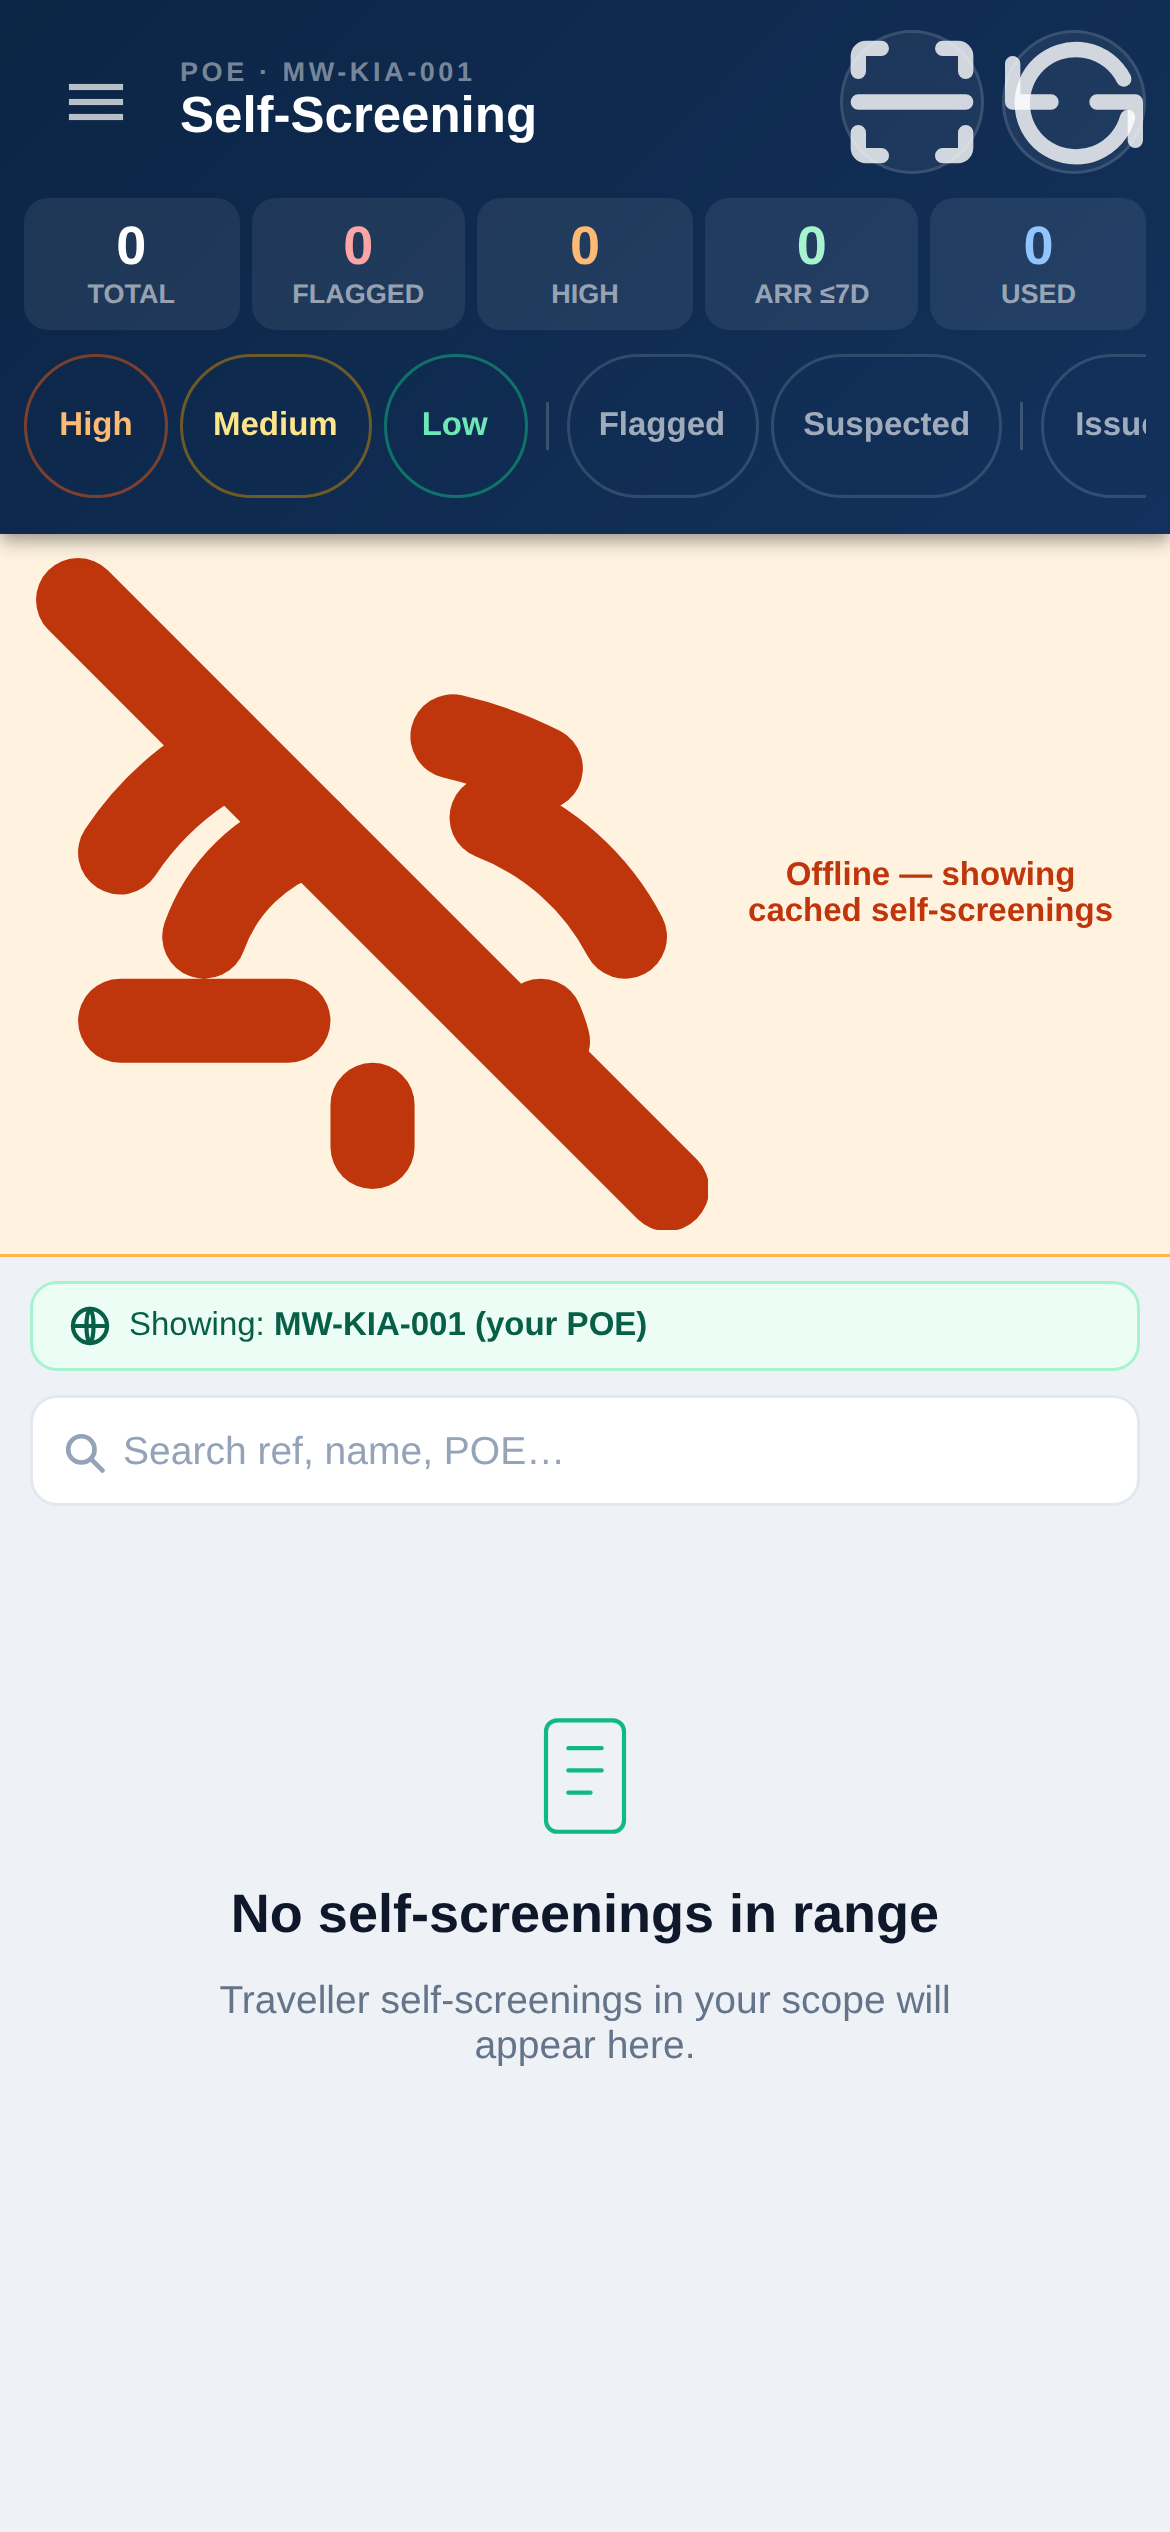
Self-screening list
Browse arrivals. See travellers who self-screened, and who was silently flagged.
Open one. Review their answers and risk before they reach you.
What to expect: A clean empty state means no self-screenings in view — widen the window to see more.
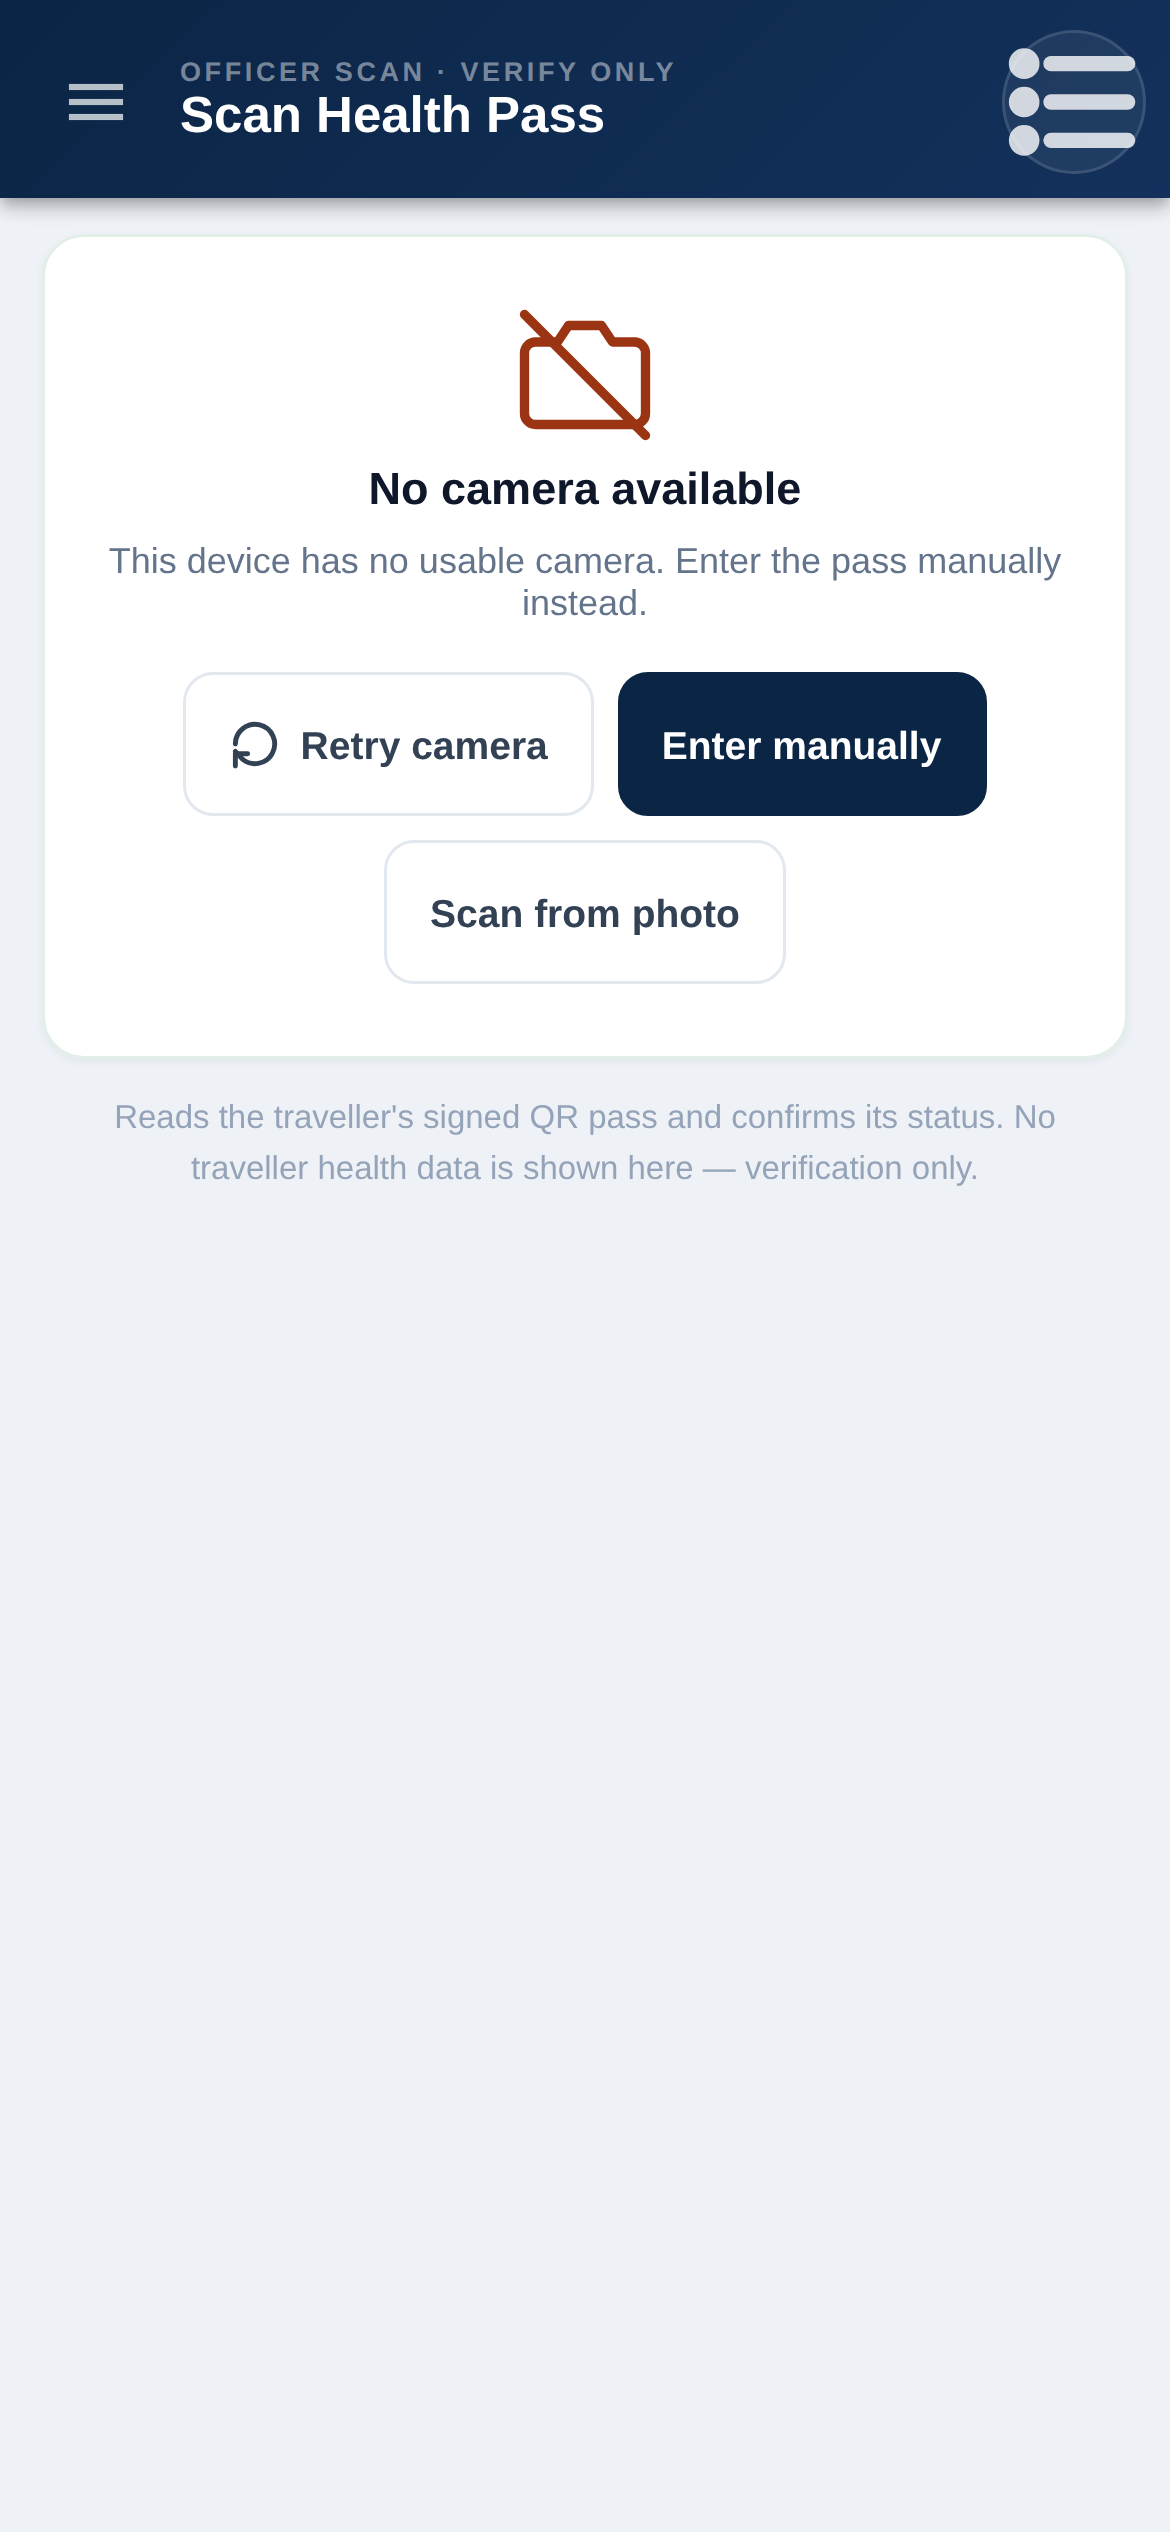
Scan a QR pass
Point the camera. Hold the traveller’s QR pass in view.
Read the result. The pass status and any flag appear instantly.
If it won’t scan. Run primary screening manually — a pass is not required to screen.
What to expect: Brighten the screen and frame the whole code for a fast scan.
Section 7
Alerts
Alerts surface situations that need attention across your point of entry, so the team responds quickly and consistently.
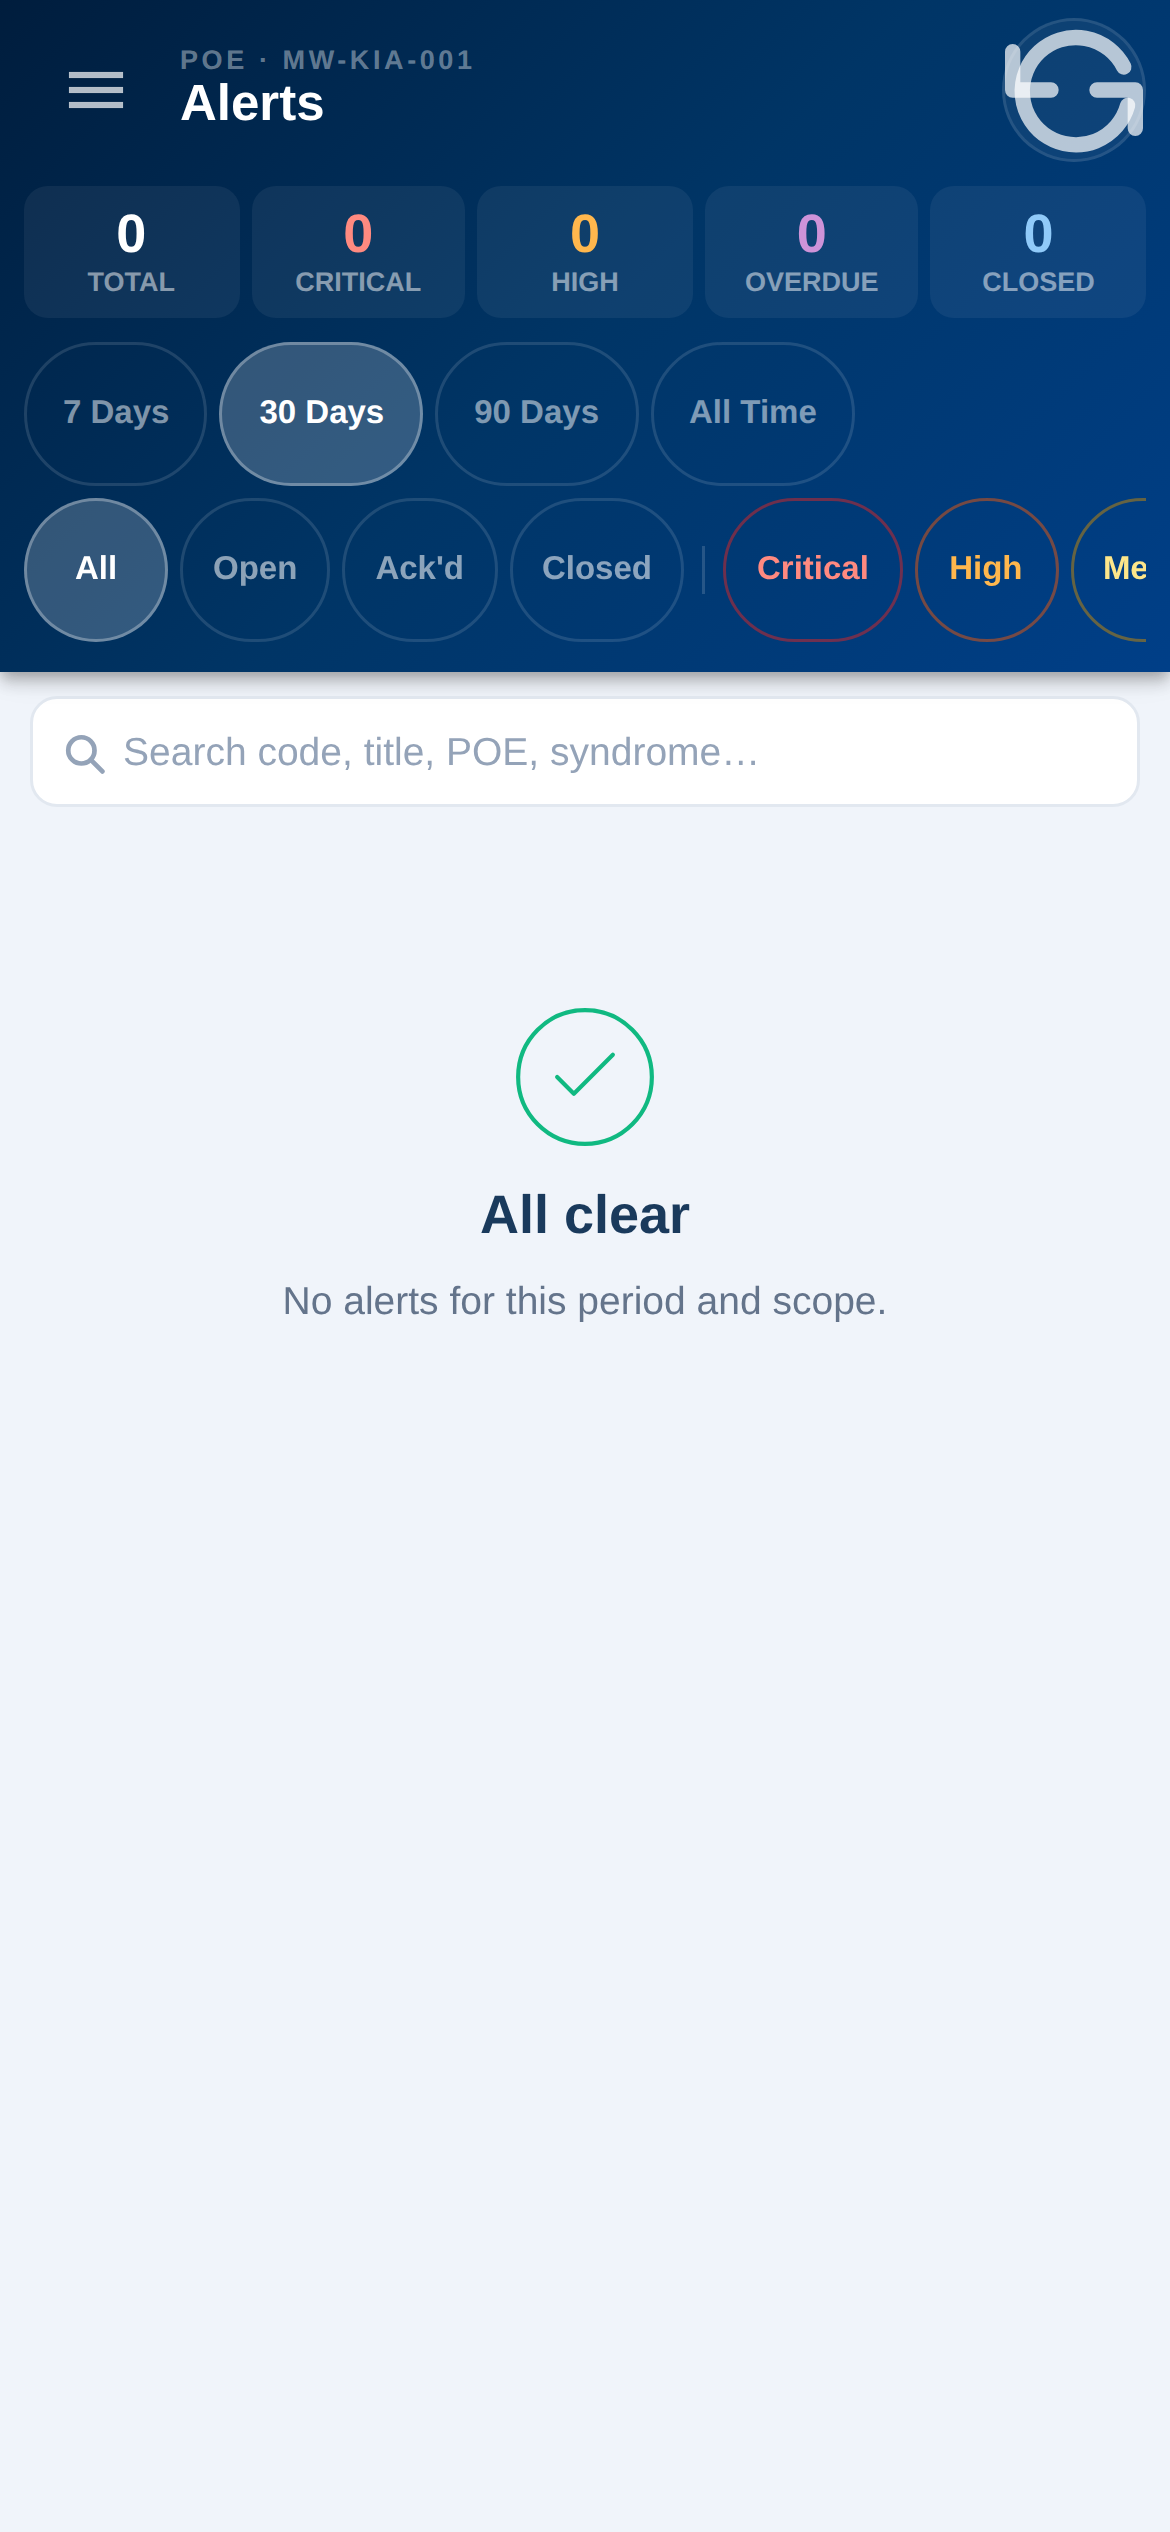
Active alerts
Review active alerts. For your assigned area.
Open an alert. See the detail and the action expected.
Act and record. Follow your post’s protocol and keep the status current.
What to expect: A quiet screen when there is nothing active.
Alert matrix
See alerts at a glance. Grouped by type and severity.
Prioritise. Focus on the highest-risk items first.
What to expect: A compact overview to complement the active-alerts list.
Section 8
Notifications
The notifications centre is where the system tells you what needs attention — new alerts, referrals and updates for your post.
Notifications centre
Check at the start of your shift. And through the day.
Tap to jump. Open the item a notification refers to.
Clear what you’ve actioned. Keep the list meaningful.
What to expect: An empty centre when there is nothing outstanding — a good sign.
Section 9
Working offline & sync
The app is built for the border — it keeps working with no signal. Records are saved safely on the device and upload automatically when you are back online.
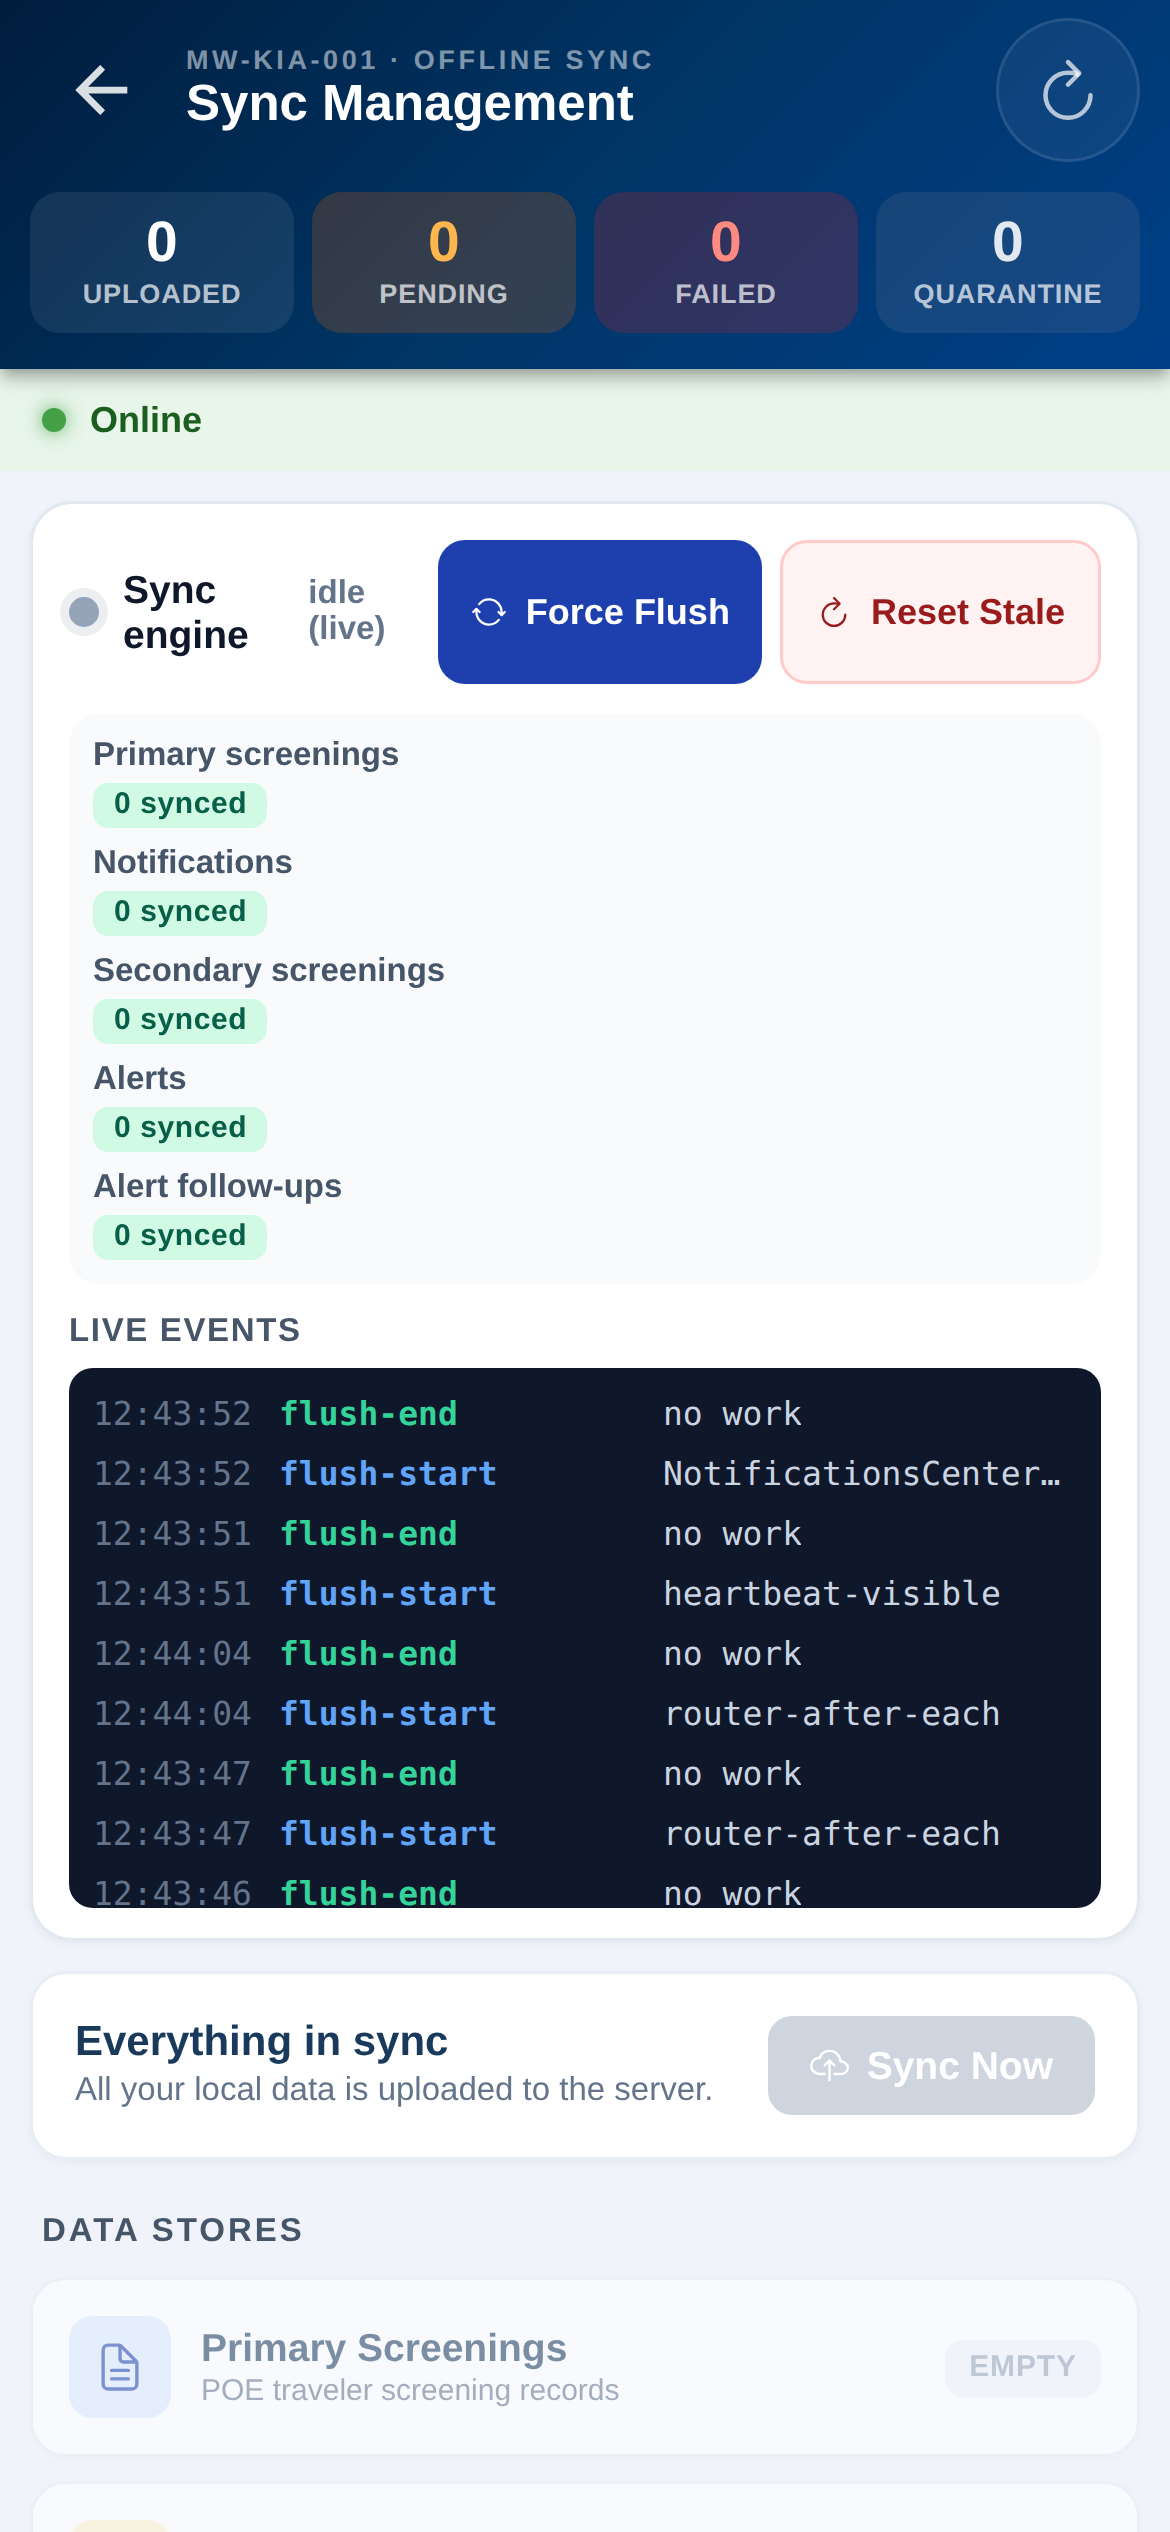
Sync management
Keep screening offline. Nothing is lost.
Watch the indicator. “All Synced” means everything is uploaded.
Return to coverage. Leave the app open a moment so the queue clears.
What to expect: “All Synced” with zero pending after you return online. Updates also apply over-the-air on next open.
Do not reinstall the app while records are still pending — wait for unsynced to reach zero.
Sync queue
See what’s waiting. Records queued to upload.
Let it drain. It clears automatically when signal returns.
What to expect: An empty queue means everything is on the server.
Sync history
Review past syncs. Confirm uploads completed.
Use for assurance. Proof your work reached the server.
What to expect: A running log of successful syncs.
Failed sync
Spot any failures. Records that could not upload.
Retry. Reconnect and let the app retry; report persistent failures.
What to expect: Usually empty. Anything here is safe on the device and will retry.
Section 10
Staff directory
Reach the right person fast — district and PHEOC officers in your scope, ready to call.
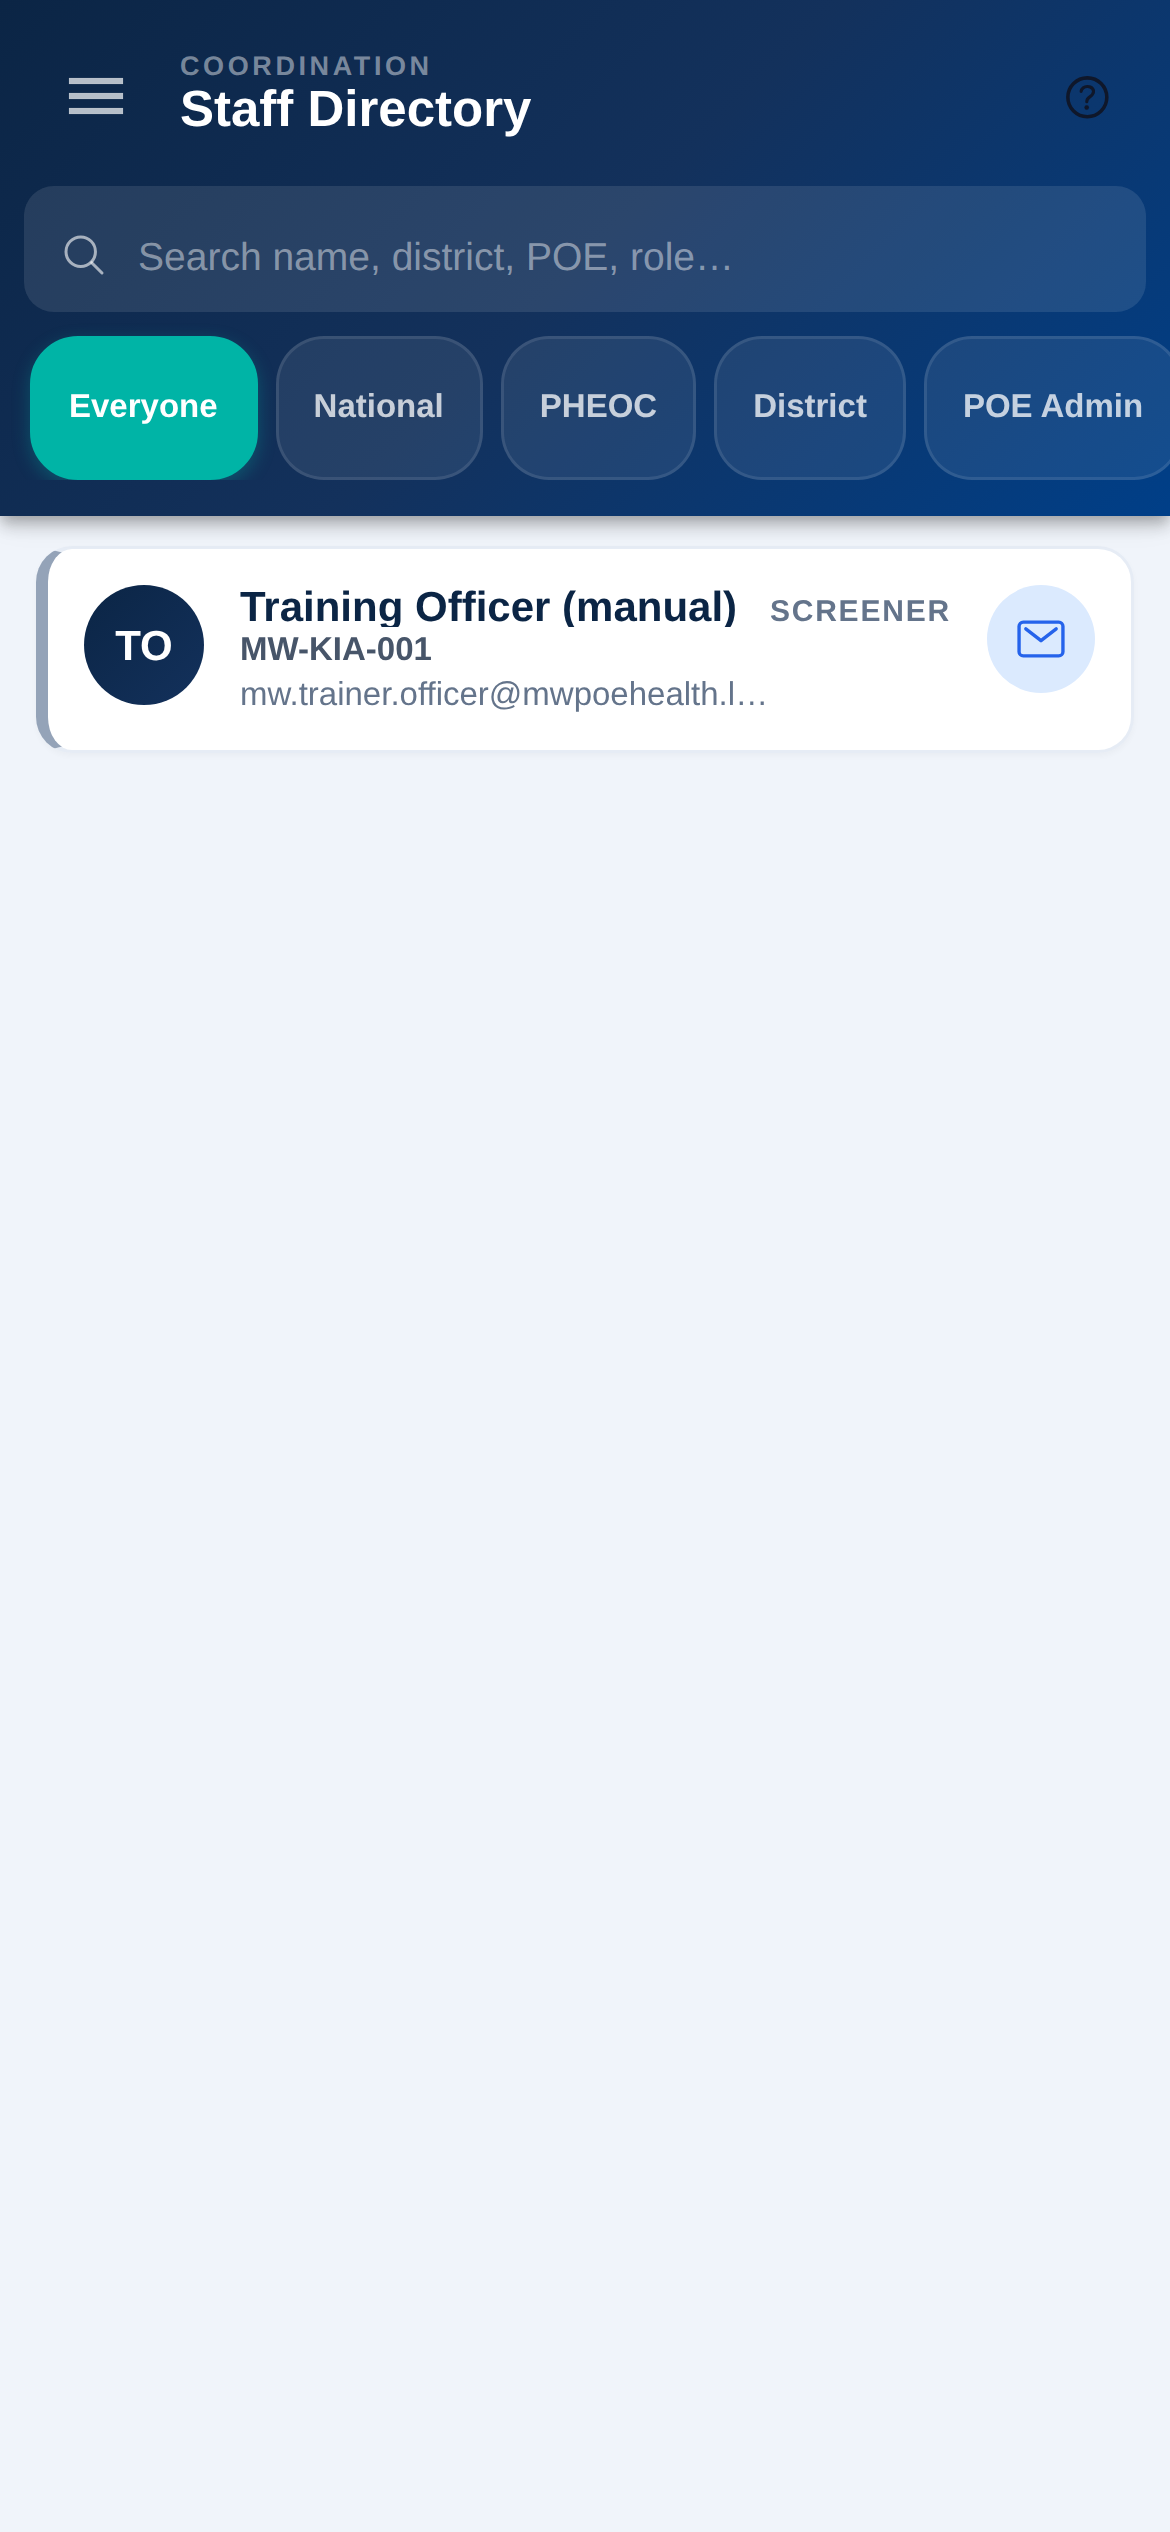
Staff directory
Find a colleague. Search the people in your area.
Tap to call. Dial directly — no copy-pasting numbers.
What to expect: Only people within your assigned scope are listed.
Section 11
Help, settings & your profile
Everything you need to tailor the app, check the device, and manage your own account.
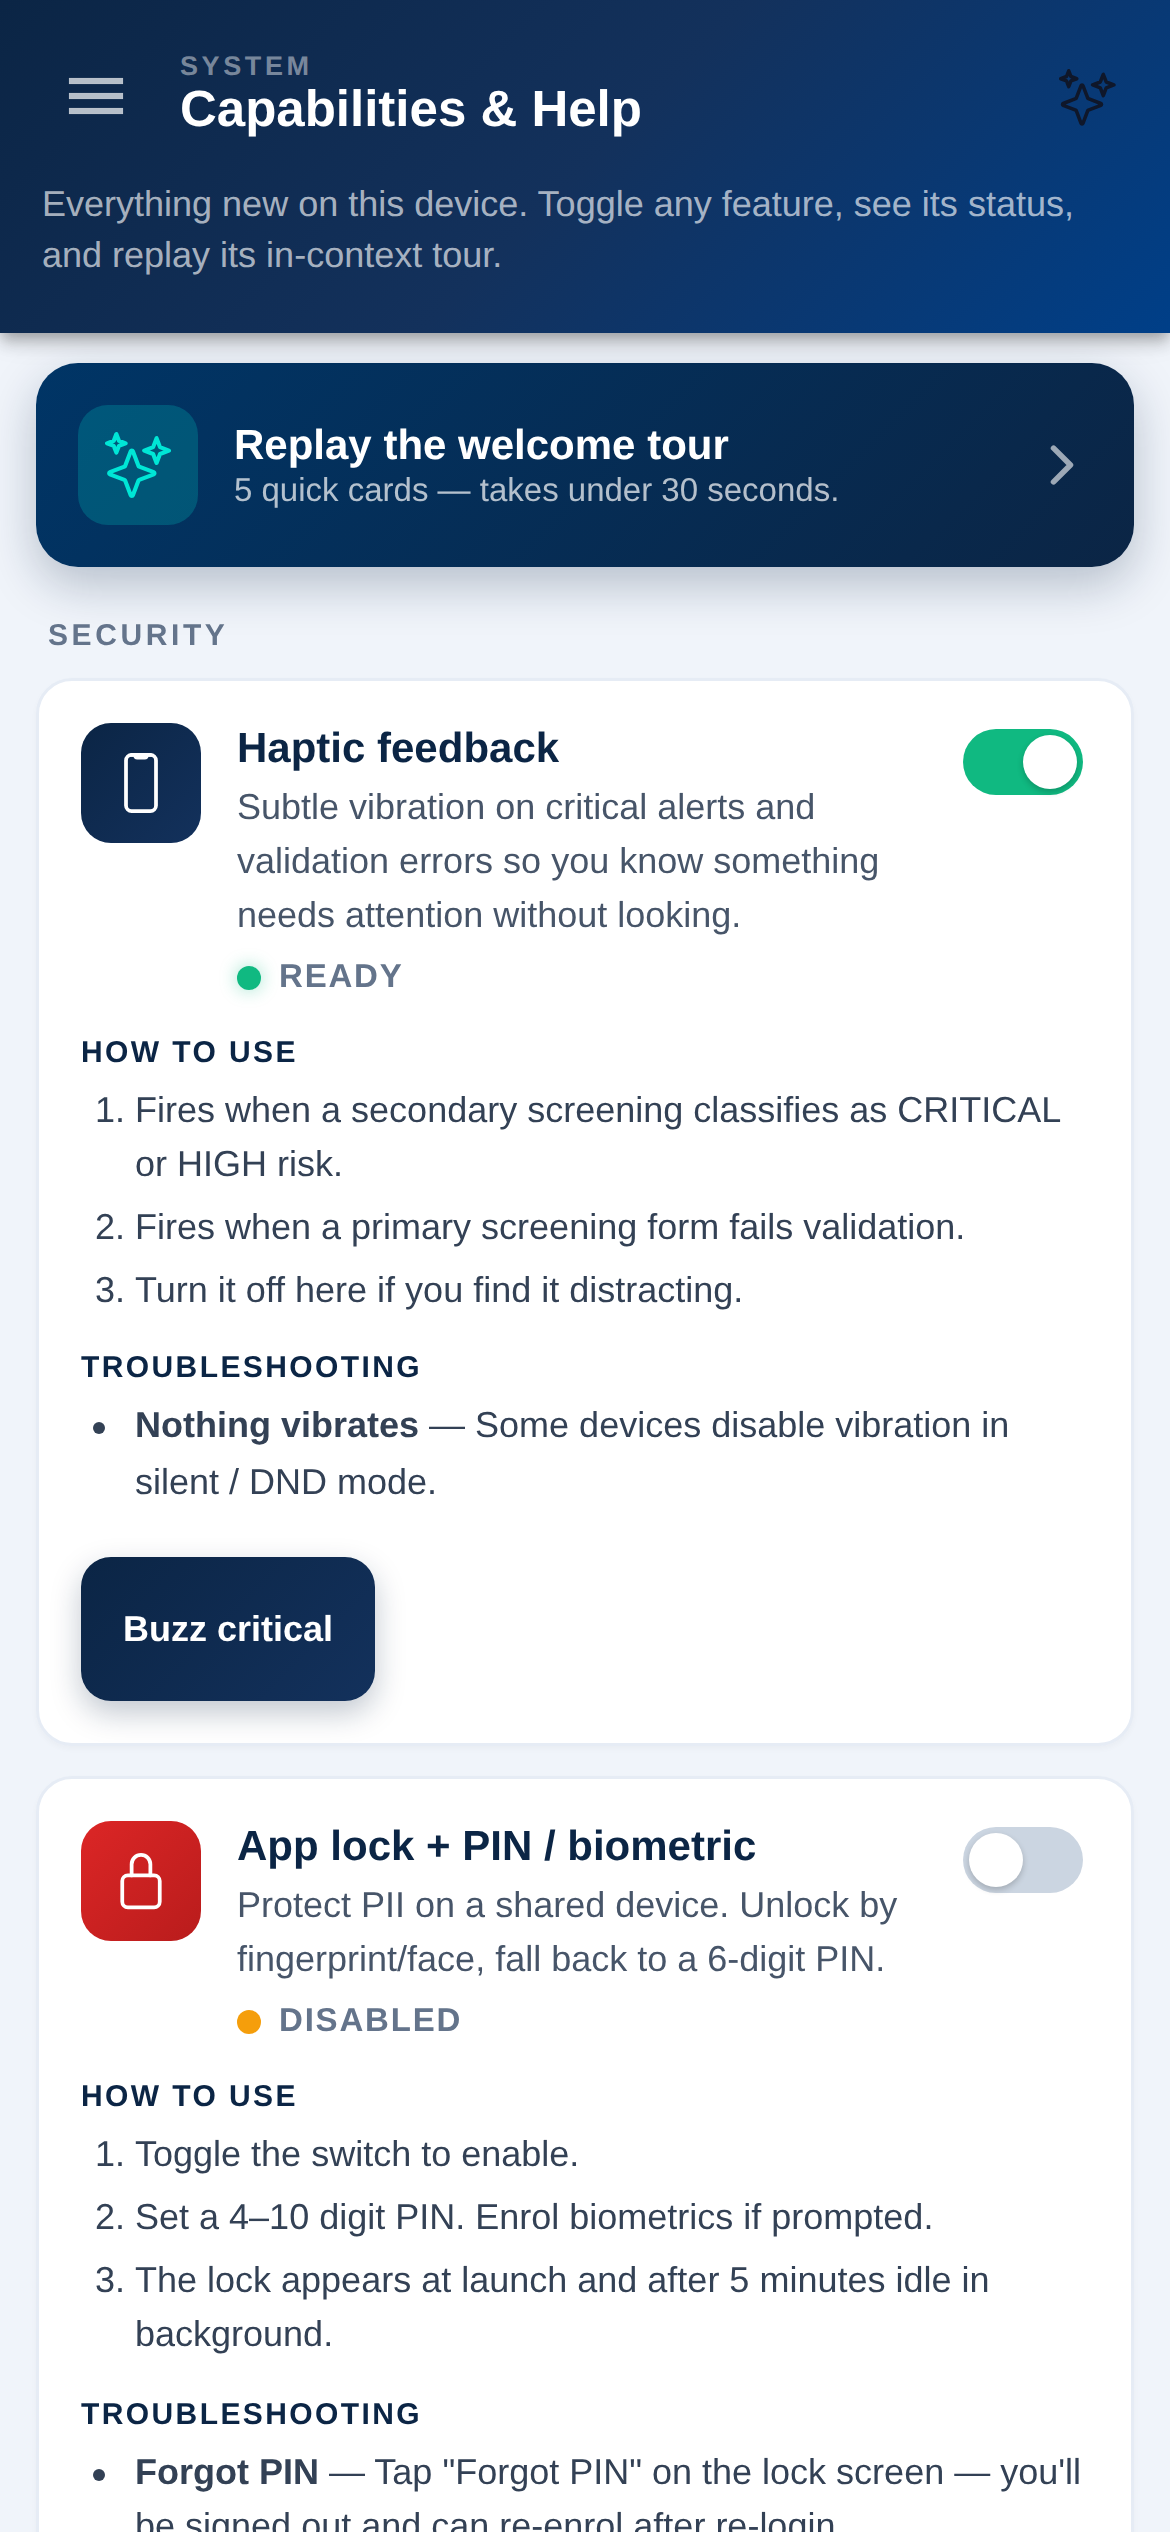
Capabilities & Help
Learn each feature. How voice, scanning, PDF sharing, reminders and app-lock work.
Replay the tour. Refresh anything you forget, anytime.
What to expect: Your in-app reference — use it before asking for support.
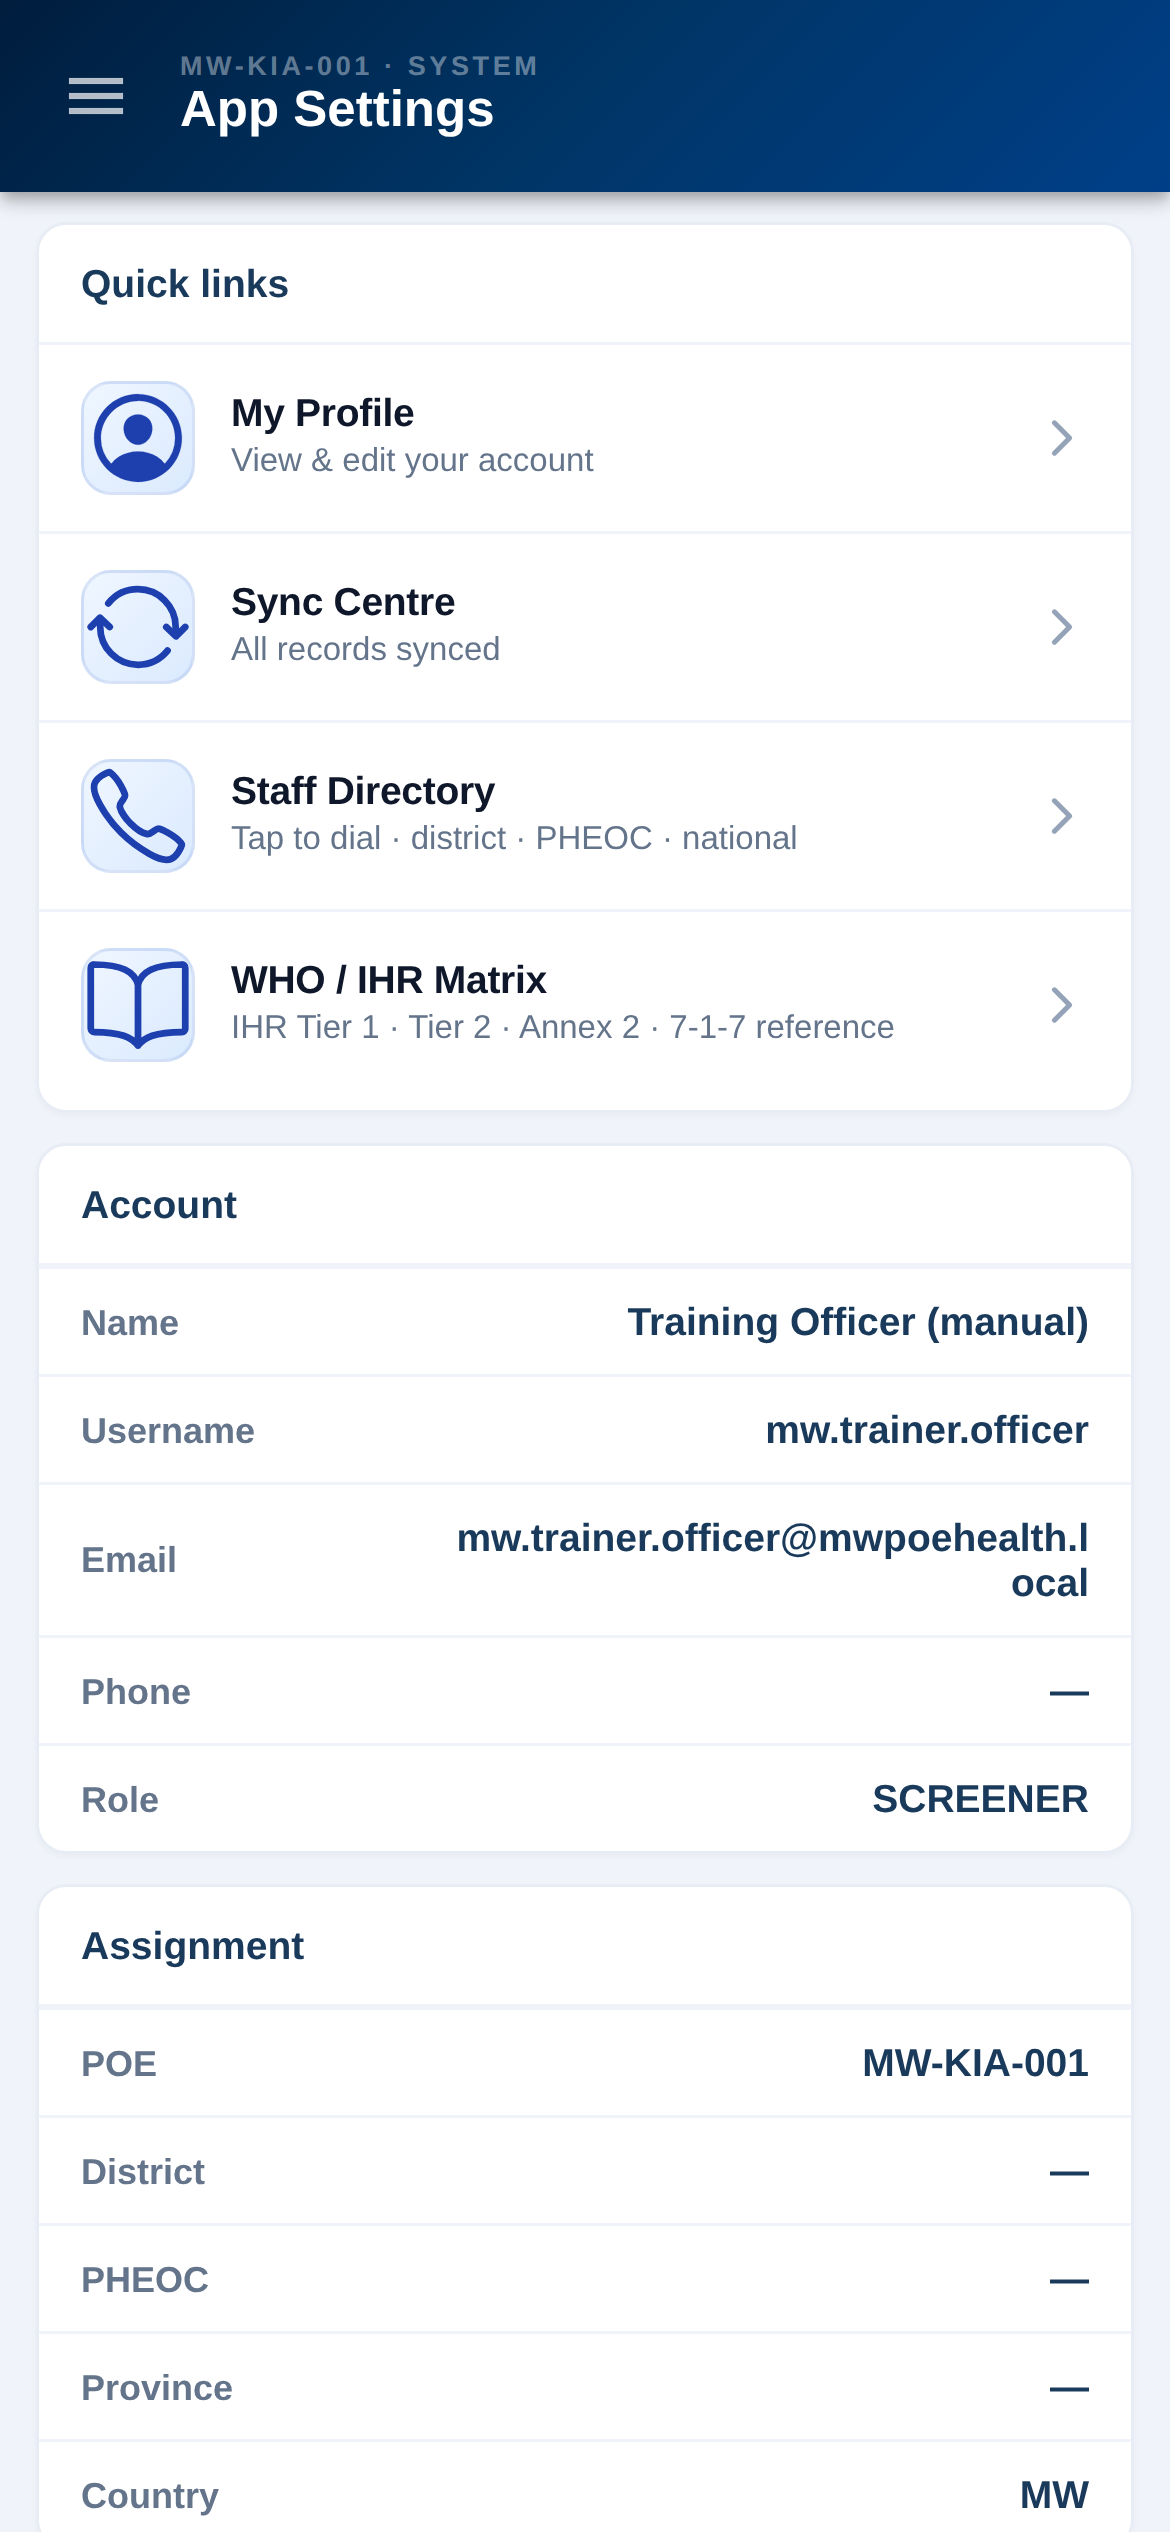
App settings
Toggle capabilities. Turn features on or off — the rest of the app keeps working.
Set the app-lock. Gate sensitive data behind a PIN or biometric on shared devices.
What to expect: Sensible defaults are already on; change only what you need.
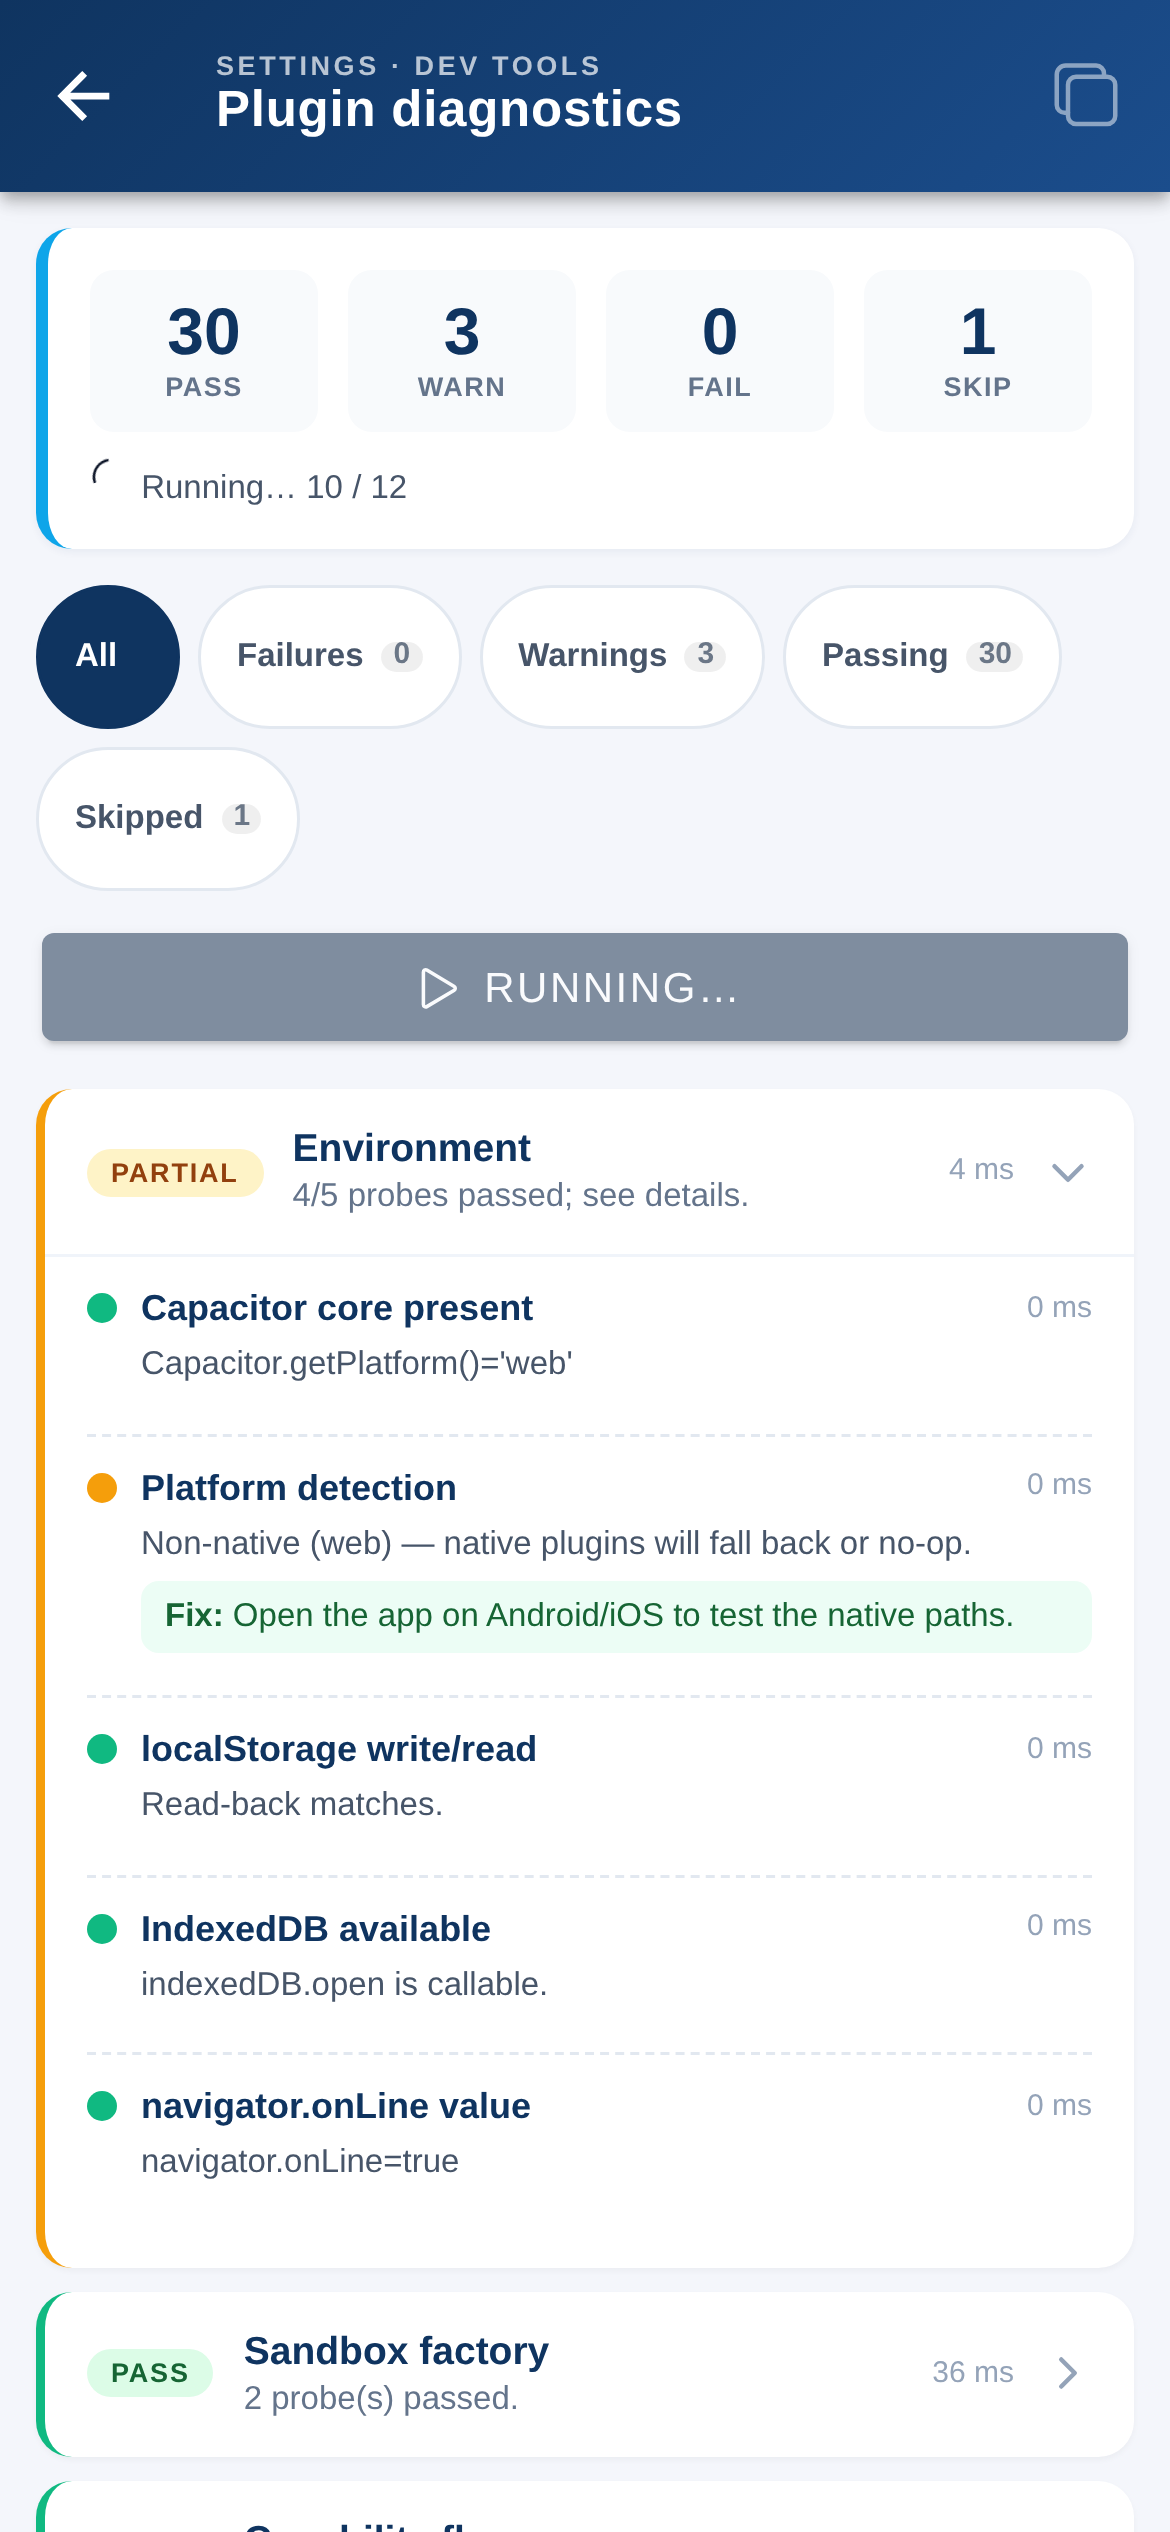
Diagnostics
Check device health. Confirm features and connectivity are working.
Share with support. Helpful when reporting a problem.
What to expect: A quick self-check when something feels off.
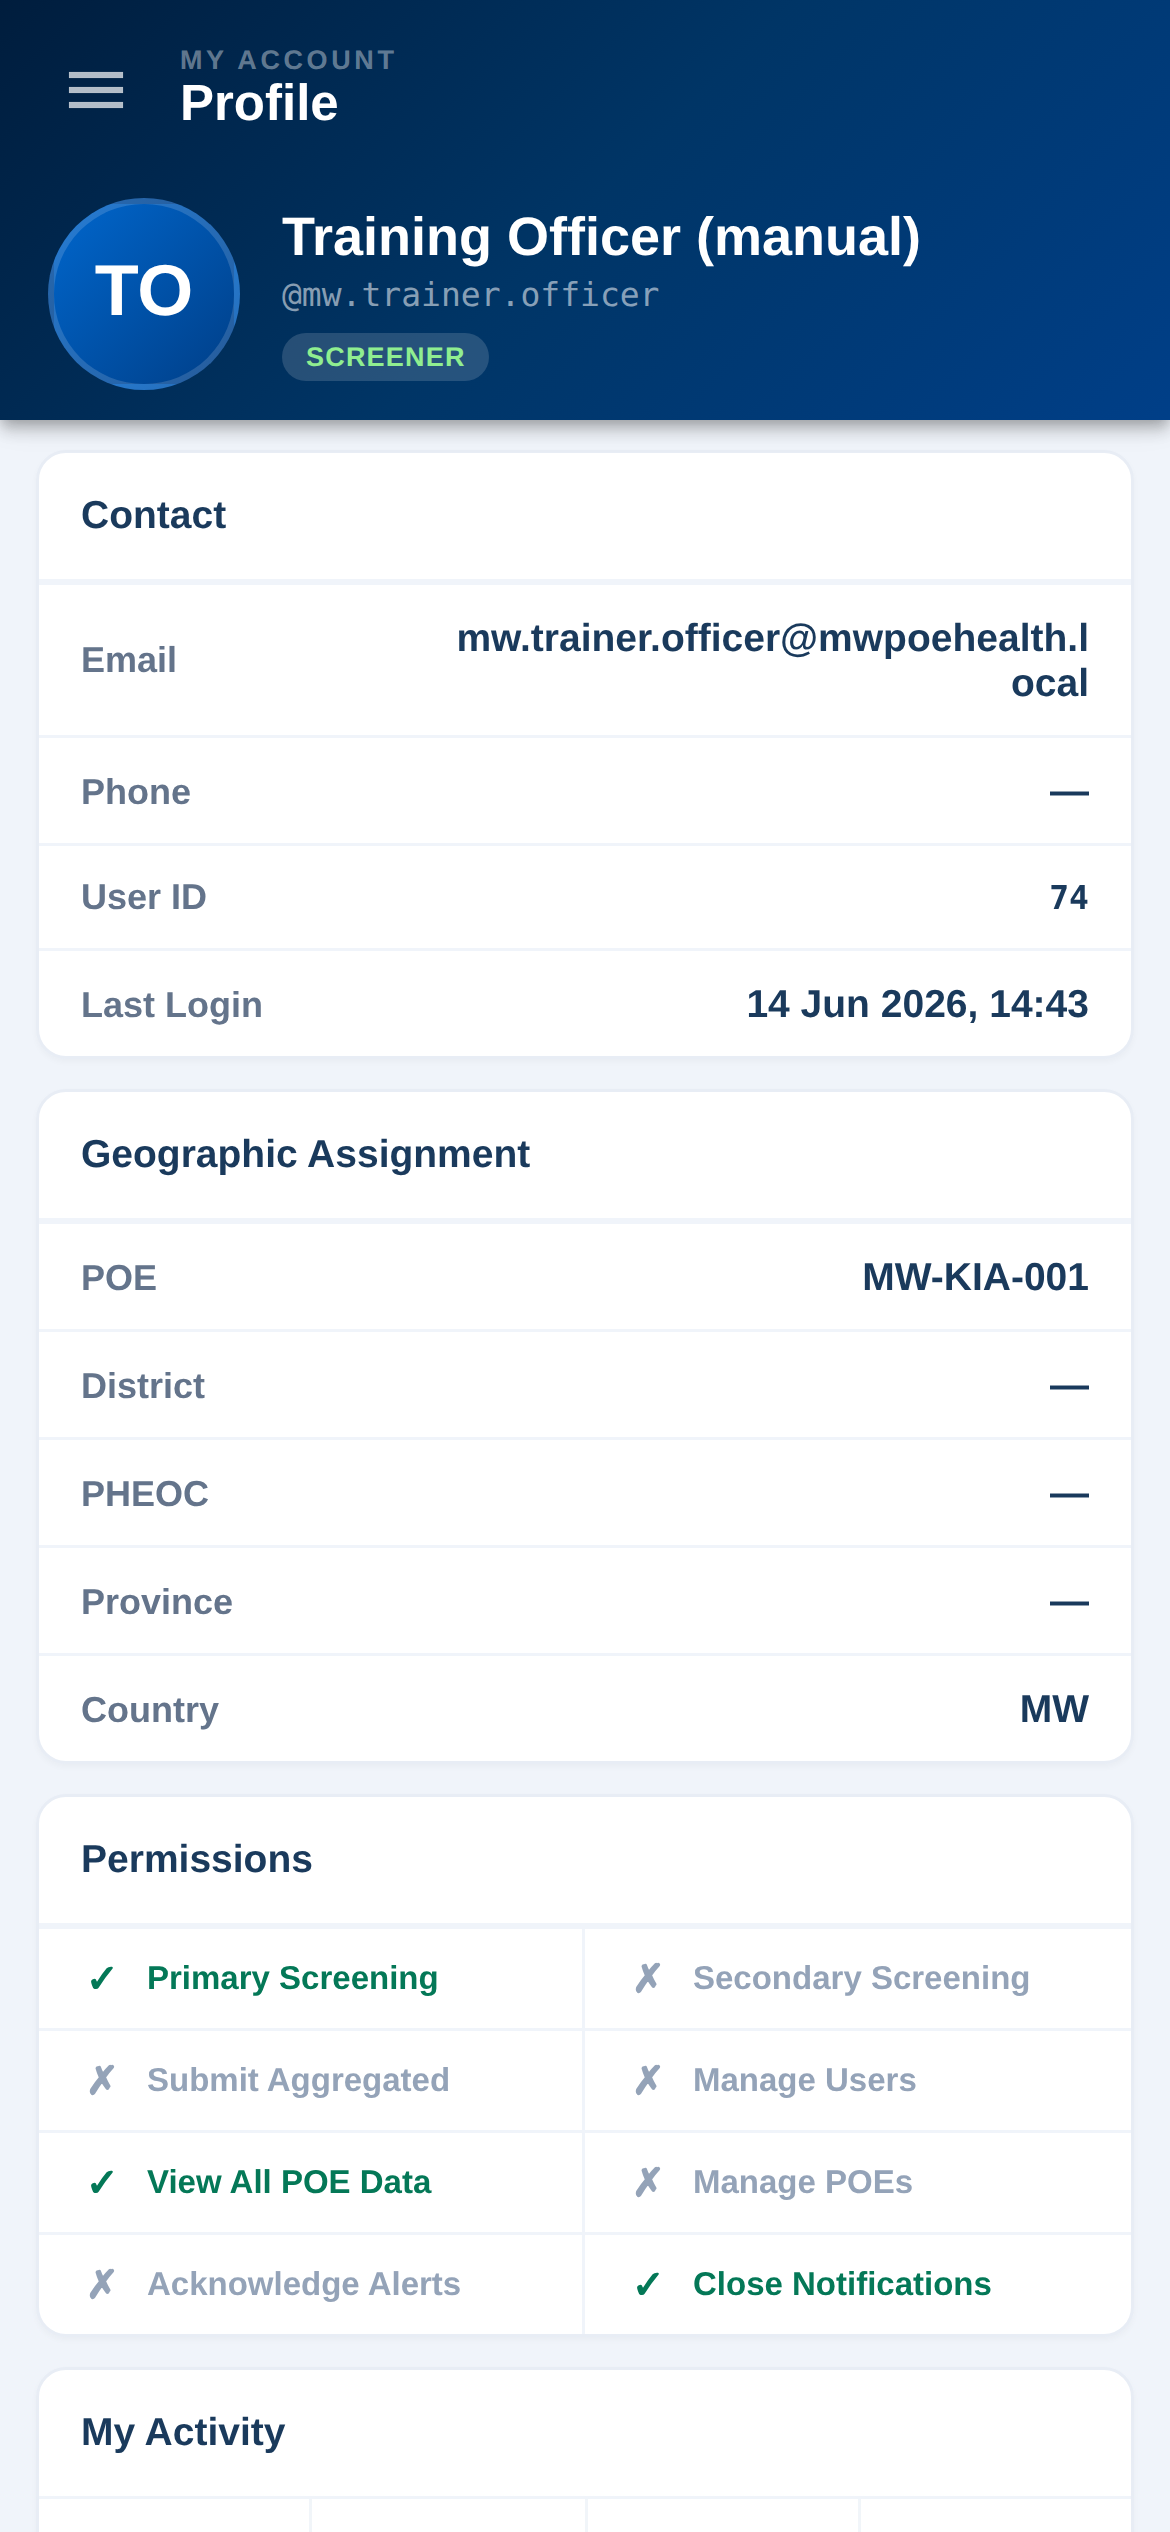
My profile
Review your account. Name, role and assigned point of entry.
Manage your PIN. Update your device PIN here.
What to expect: Your role and scope are set by an administrator — contact them to change access.
Section 12
Passwords & support
Most problems have a quick fix. Practise in Training whenever you are unsure.
Forgot your password
Tap Forgot password on sign-in, enter your account email, get a 6-digit code, then set a new password. No email? Your administrator can reset it.
Practise safely
Use the Training app — it mirrors Live but nothing is real. Confirm the environment in the header before screening real travellers.
A QR pass won’t scan
Brighten the screen and frame the whole code. If it still won’t scan, run primary screening manually.
Still stuck
Contact your POE administrator or supervisor first. More help is on the support page.
Remember: the app supports your judgement — it does not replace it. Follow Ministry of Health protocol at all times.